It's December, and I'm ready for snow. We've been so close. Last week, a sleet shower deposited a cover of tiny little balls of ice.

Rain followed, however, although it was still cold. Our neighborhood animals seem oblivious of these changing temperatures. The birds still visit the feeders and lounge casually on our lilac bushes. The little cat we've been feeding still comes around for a handout.

The squirrels are still busy in the yard, although they pause a bit when the rain is coming down.

The intermittent cold temperatures mean that we've had some beautiful frosts.

I love when frost gathers in the fern-like leaves of the yarrow plants...

...and on its still-blooming flowers.

The frost covers the long, blade-like leaves of my irises and lilies.

It makes beautiful, intricate shapes on the seed pods that I've left up for "winter interest."

I love it!
Although Christmas is just a few weeks away, I've fallen far behind in Christmas decorating. This is the busiest time of year for our business, and that occupies a good deal of my time. I stubbornly insist on hand-stamping our Christmas cards, and we have a LOT of cards to send out. Even though I'm doing them assembly-style, it's still taking a bit longer than I planned. Then there are the loads of Christmas gifts that must be packed and sent to our out-of-town friends. Thankfully, Todd surprised me with some poinsettias last week. At least we've got
some semblance of Christmas around here!

My mother surprised me last week, too, with a quilt. My great grandmother hand-quilted it in the 1930s, and I love it!

I've been too busy, myself, for any sewing, or quilting, or knitting. But I did carve out some time for a quick craft project. Anyone who dabbles in rubber stamping knows that those little stamps can be awfully expensive. You can pay up to $20 for just one stamp, although most fall in the $8 - $12 range. I've found a cheaper way to expand my collection.
I paid $20 for this series of vintage women's faces.

There are 22 faces total and they come in one 8 1/2 x 11 inch rubber sheet.

I cut them out, one at a time, and sprayed the backs with adhesive.

Then I glued them on a $1 piece of foam, along with some others I'd found on etsy for around $1 each.

I let them dry overnight, and then use scissors to cut around the shapes. The foam cuts easily and it takes no time at all to cut them out.

Then, when I want to use them, I just put a little piece of double-sided tape on the back and stick them on a clear acrylic block to stamp the image.

It's the same quality as a wood-mounted rubber stamp, but for a little time - and almost no money - I've got a whole new stack of stamps!
Although I haven't been doing much crafting lately, I have been making a
lot of cupcakes. Carrot cupcakes with cream cheese frosting...

Vanilla cupcakes with vanilla frosting and sprinkles...

And the same cupcakes, with chocolate frosting and sprinkles. The sprinkles make them awfully festive and it's just not the same without them.

For as many cupcakes as I make, I'm not much of a cake person. When I really want a treat and calories are not an issue (which sadly has been the case around here lately!), I look to my favorite brownie recipe. These aren't tall, light, cake-like brownies. They're compact, dense, and incredibly fudgy. Topped with a generous slathering of vanilla frosting - and sprinkles - and served with a bowl of ice cream...I can't imagine a more rich, decadent dessert. I call them my fudgy, pudgy brownies and I make them when I'm feeling really devil-may-care.
 Easy Fudgy, Pudgy Browniesfrom allrecipes.com
Makes 12 browniesBrownie Ingredients1/2 cup butter
1 cup white sugar
2 eggs
1 teaspoon vanilla
1/3 cup unsweetened cocoa powder
1/2 cup white flour
1/4 teaspoon salt
1/4 teaspoon baking powder
Crackling Glaze Frosting (optional)
3 tablespoons butter, softened
3 tablespoons unsweetened cocoa powder
1 tablespoon honey
1 teaspoon vanilla
1 cup powdered sugar
To make the brownies, preheat your oven to 350 degrees and grease an 8 inch square pan. Melt your butter in a saucepan. Once melted, remove from heat and stir in sugar, eggs, and vanilla. In a separate bowl, mix together the cocoa powder, flour, salt, and baking powder, and then fold the dry mixture into the butter mixture. Do not overmix! When combined, pour into your pan and bake for about 25 minutes.
To make the optional frosting, combine all ingredients and mix well. It may initially resist your efforts, and if you like, you can sprinkle in some milk - just a bit - to help it mix. When combined, frost brownies while they're still warm.
Try some this week. They're easy and delicious!
Sadly, Todd and I will not be indulging in these sweet treats for much longer. We want to commit to healthier lifestyles, and to train ourselves to reach for apples instead of cupcakes! However, I'll still be in the kitchen, trying to mix up the best flavor for the least caloric price. Stay tuned!

 ...and the ornaments are up.
 We've put up the Christmas cards we've received, and prepared a batch of cards to go out.
 Todd is faithfully opening up his daily advent calendar. I just cut old envelopes in half and stamped the date...
 ...and filled them with silly jokes, Bible verses, songs, and other little things.
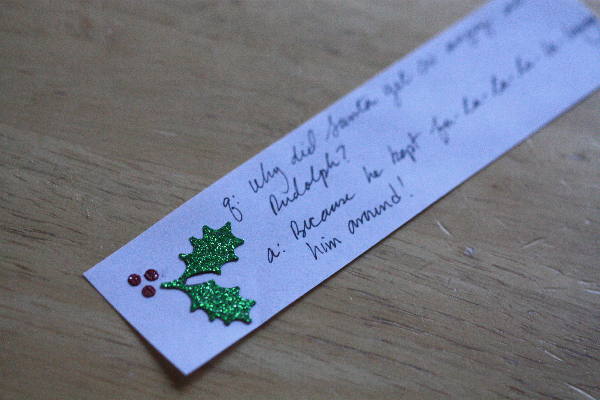 I've been in a rush, because we're getting ready to start our hectic Christmas season, full of family time. I had time, though, to pound out one final Christmas craft and hastily photograph it this morning before it gets tossed in a suitcase.
 Yoda...
 C-3PO...
 Storm Troopers...
 Boba Fett...
 ...and Darth Vader.
 It's a great craft for kids and Star Wars fans alike!


