 Today, however, is March 1st, and the first day of spring in the Chamberlain household. My husbands protests that spring won't be here for another 3 weeks, but I was vindicated by some surprises in our backyard. The daffodils are coming...
 ...and the crocuses are popping up! My tulips aren't far behind. Their satiny furled tips are just breaking the surface.
 So spring is here, and, per my plan, I'm changing things up around here to reflect the season. Last week I prepared. I measured and cut all my fabric, then hemmed the rough edges on my sewing machine.
 Unfortunately, I'm terrible at using it. I still have to refer to the manual when the bobbin needs filled, after 5 years of ownership (in my defense, it's almost never been used). I think my machine is a bit malicious. I'll think I've sewn a relatively straight line, like this:
 But underneath, the thread is twisted and looped in a decidedly mocking fashion. I prefer to sew by hand if something needs sewn.
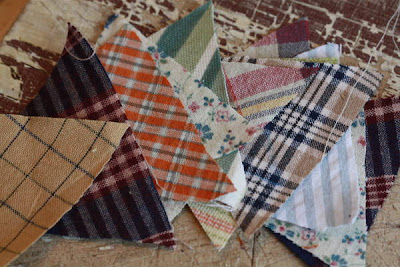
 I did just that with my next project. I'm in love with bunting flags and decided to make some mini-flags for the living room. I cut triangles from scrap fabric...
 ...and hand-stitched the edges. Let me tell you, these are pretty rough...but I can't complain, since I got them stitched in the time it took to finish The Social Network. More on these soon...
 Starting last night, I spent hours and hours taking down my fall and winter things. My deep red plaids, my carefully pressed and framed leaves, my decorative gourds, my little dishes of acorns...all gone. Even the poinsettias got the axe. I put my spring-themed fabrics on the couches and bookshelves. I lined up all remaining houseplants on the window seat to create a soothing green space. Mostly, since this is a work in progress, I'm trying to create small "spring spaces" that will spread as I continue to work on this project...especially after the garden centers open up!
Here's an example of a small, simple green space I created next to the couch:
 ...and a little spring-themed spot atop a small bookcase in a very dim corner of the living room:
 Marjolein Bastin is a beautiful illustrator, and I have some of her books. Here I framed two drawings that fit the season:
 Closer, you can see many things that fit in with my theme: bees, spring flowers, and eggs.
 The other side is a really nice depiction of a bird that I particularly like.
 This frame went over the dim-corner bookcase to create a bright, cheerful space.
 In the other end of the living room, we have another long, dark bookcase. I filled 3 mason jars with things that I like: white and clear buttons, pebbles, and ceramic eggs. This egg art print pulled it together, hopefully. Mason jars at Goodwill: .50 each. Art print: $10. Frame: $1 at Goodwill. I like to do these things on the cheap!
 Here are the bunting flags! I just threaded a needle with multi-stranded embroidery thread and pushed through the top of the bunting triangle. I think it makes a nice look! I'm going to make another one this week.
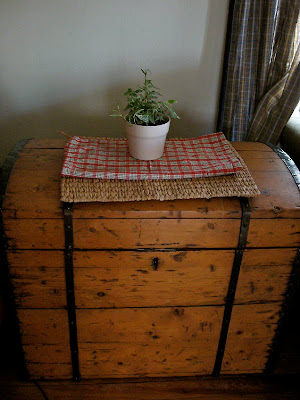
 The kitchen is still a work in progress...but I've made some headway in the sun room. I bought matching pots at IKEA (I believe they were .75 each!) and repotted all the little houseplants I had on the window sill. It needed some color, so I cut a fabric runner for underneath. Much better!
 I will continue working on this for the next few weeks, in between my regular work, and my other hobbies that compete for attention. One of those is knitting, of course, and I've managed a bit of that late last week. I'm knitting mittens, and they have really clever cuffs. You knit the fabric in one long tube, with one purl row in the center of your 2 stockinette sides.
 When you're done, you fold up the bottom and knit it together with the next row.
 That purl row that was in the center becomes a clean bottom row for your mitten cuff.
 I'm nearly done. It's time consuming to pick up each stitch and knit it together with the new stitch, but at least it's a mitten and not, say, a sweater. I'm excited to get to the next part!
 I always, always make time to bake, especially with Todd hard at work on his dissertation and therefore requiring tasty snacks at regular intervals. This recipe is a little time consuming but the resulting cookie is awfully tasty! This recipe is taken directly from Bakingdom with no modifications. Let me tell you...that woman knows what she's doing! It was her idea to invent cinnamon roll...cookies.
Cinnarookies
Taken from Bakingdom
Makes 3 - 4 dozen cookies
COOKIE:
1 cup unsalted butter, softened
1/2 cup brown sugar
1/2 cup white sugar
2 eggs
1 teaspoon vanilla
2 teaspoons cinnamon
3 cups flour
2 teaspoons baking powder
1 teaspoon salt
FILLING:
1/4 cup unsalted butter, very soft
1/4 cup plus 2 tablespoons packed brown sugar
2 teaspoons cinnamon
ICING:
2 cups powdered sugar
2 tablespoons melted butter
2 teaspoons vanilla
2 - 4 tablespoons milk
Combine flour, cinnamon, baking powder, and salt. In another bowl, cream your butter and sugars together until fluffy. Add eggs one at a time, beating after each addition. Then add half of the flour mixture and mix until combined. Add the rest of your flour mixture and combine. Form dough into a ball, cover with plastic wrap, and place in freezer for at least 30 minutes.
After the dough has chilled, split the dough ball into two halves. Put one half into the refrigerator and pat the other half into a 9 x 12" rectangle. Let me tell you, it is messy and the dough will NOT go easily. Just push it together the best that you can!
 Once you've beat it into submission, spread your soft butter on top, and then sprinkle with the brown sugar and cinnamon.
 Carefully roll it into a log and cover with plastic wrap. It will need to chill in the freezer for 30 minutes. After you put it there, go ahead and repeat the process with the dough ball that you placed in the refrigerator earlier.
  Preheat your oven to 350 degrees. Remove your logs from the freezer and slice them into half inch slices...you should get close to 24 per log. Place on greased cookie sheets and bake for 10 - 12 minutes.
They already look like cinnamon rolls!
 Once they've cooled, mix your icing ingredients together to your desired consistency and drizzle on cookies.
 They're really good...like a sweet, cinnamon-y shortbread cookie. It's definitely worth the effort to make these!
Enjoy...and happy spring!


No comments:
Post a Comment