
I've been somewhat disappointed with the results of my bread-making in the past. Loaves seemed dense, and they didn't rise much. I gradually stopped trying. This time, though, I was determined to crack the good-loaf code. I went to reliable sources (Annie's Eats for the bread recipe, and King Arthur Flour for bread-making tips and videos) and studied up. I realized that I've been making quite a few mistakes. I'll walk you through them here, and show how I was able to take my bread-making to a new - and tasty - level! You don't need a bread machine or fancy equipment to have fantastic bread.
The Best White Bread
Annie's Eats
Yields 2 loaves
Ingredients
4½ tsp. instant (rapid rise) yeast
¾ cup plus 2 2/3 cup warm water, divided (105-115˚ F)
¼ cup granulated sugar
1 tbsp. salt
3 tbsp. unsalted butter, at room temperature
9-10 cups all-purpose flour
Directions
(Note: I halved the recipe for our needs, and only made one loaf. The directions are the same, with the exception that full-recipe doughs will need to be split in two and folded into their respective loaf pans.)
Dissolve your yeast in 3/4 cup of warm water.
MISTAKE #1: I knew that "hot" water kills yeast, but I believed that it was important to have fairly hot water to activate it. You really just need warm water to get it going.
Stir in the rest of the water and the rest of the ingredients, but only stir in 5 cups of flour. Mix in the rest a cup at a time and either hand- or machine-knead for 6 - 8 minutes. Your dough ball should feel sticky, but it shouldn't stick to your fingers. Add more flour if it feels too sticky. Place it in an oiled bowl, cover, and let rise in a warm place until doubled, about an hour.
MISTAKE #2: My oven has a WARM setting of 175 degrees. Perfect for bread dough, right? Not so much. I learned that the optimum temperature is 90 degrees. Really, you should turn on your oven for about 20 seconds and then turn it off. It doesn't need too much warmth to get going! Again, too much heat kills yeast, and then your loaf won't rise.
After an hour:

You should be able to leave a nice finger indentation if you press it.

When you dump your dough out on a floured surface, you should be able to see all the nice holes created by your active yeast:

Pat your dough gently into an oval shape.

Fold one third over and lightly seam it so it will stay:

Fold the opposite third over and do the same:
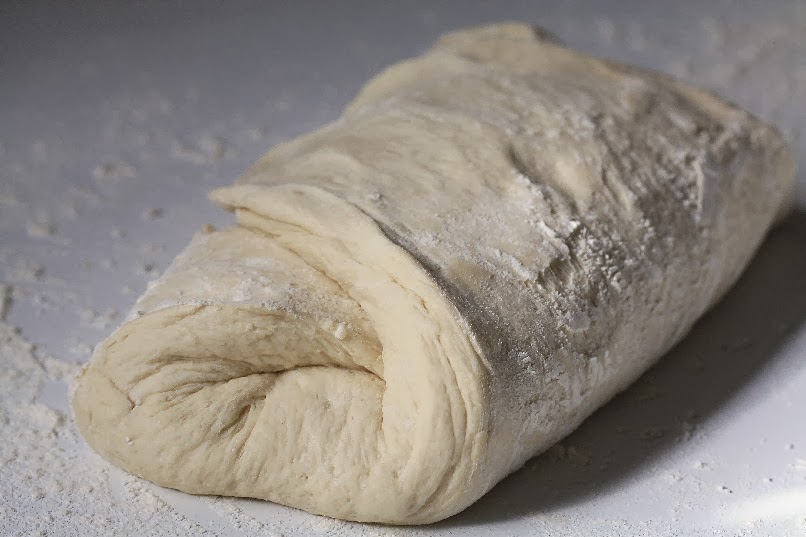
Roll the ends under a bit and put your loaf seam side down in a greased loaf pan. Gently press the top down to ensure that the dough fills the pan evenly.

MISTAKE #3: Previously, I just patted my loaves into loaf-shaped dough balls, without this proper shaping.
Preheat your oven to 375 degrees (the Annie's Eats recipe says 400, but that seemed a bit high to me, so I decided to err on the side of caution) and let your dough rise in a warm place for about 35 - 45 minutes. A good tip I read was to microwave a cup of water until the water boils, then place your covered loaf pan in the microwave with the cup. The steam creates the perfect temperature for rising:

I was pretty bowled over by this massive rise! It's the best I've ever gotten.
Bake your loaf for 30 minutes. To be sure it's done, pop it out and thump on the bottom. If it sounds hollow, it's done! And so beautiful.

MISTAKE #4: cutting into a loaf after just a few minutes.
I learned to wait at LEAST 30 minutes before cutting into fresh-baked bread. The inside will be a bit drier, and you'll be less likely to crush it when you slice it. It seems to taste better that way, too!
Fresh-baked bread makes the MOST incredible bread pudding, grilled-cheese sandwiches, and...french toast.

Have a great week!


No comments:
Post a Comment