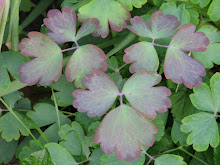
The tree directly outside our sun room door is such a vibrant yellow. This is definitely our favorite room of the house, and certain times of year, like the fall, are even better!

There's still enough sun to keep the cats happy...

...but it's finally cool (and delightfully mosquito-free) enough to get outside and move around comfortably. Todd finally moved the kayaks outside...

...and built a rack in our carport. Easy access means more time on the water!

Cooler nights mean fires down by the water, too.

We have our intrepid guard dog...
...and "the thinker," trying unsuccessfully to best me at Scrabble.

There's a new creature in our little animal kingdom here that I've been seeing more and more...a woodchuck (groundhog)! He is irritatingly difficult to photograph. By the time I see him, fumble with my lens, and take that first shaky shot (just like when making crepes, the first one's always a goner)...

...he's scampering off into the woods.

The other day I caught him running down a tree trunk (woodchucks climb trees?!?) before escaping into the brush. Why are they called groundhogs? From Scientific American:
"Groundhogs are also variously referred to as woodchucks, whistle-pigs, or land-beavers. The name whistle-pig comes from the fact that, when alarmed, a groundhog will emit a high-pitched whistle as a warning to the rest of his or her colony. The name woodchuck has nothing to do with wood. Or chucking. It is derived from the Algonquian name for the critters, wuchak."
Pretty interesting! I'm going to keep my camera ready and hopefully I can get a good shot!
I've been moving forward in my quilting class. First we made a crazy quilt square. My square is a sad commentary on what happens when you stretch some fabric to fit and let other fabric lay slack. Sigh.

Onto the next project. We were given four 12" squares of paper and 4 black strips. The black strips were sewn diagonally through the middle, and strips of random sizes and patterns sewn on, all in a row, until the square was covered. Then it was trimmed, ironed, and paper removed from back. Once all 4 squares were done, they were sewn together to make a pillow front.

I thought it would look awful, but it's kind of growing on me. Sorry for the poor picture quality...it's very overcast today.
I also embroidered a little sign for a friend who just had a baby and sewed fabric strips on the edges to make a little frame.

I used stem stitch to embroider the name 'dovey,' but in hindsight it was too clunky for such a small space. If I could do it again, I'd use a straight stitch or back stitch to make it more simple.
In other craft news, I made this card for another friend's birthday recently. I blew up the image on the computer screen, traced it, cut out all the parts, and glued them together. The sentiment was a mishmash of various Viking puns I found online. I love it!


Of course, I spent my entire weekend baking and decorating Halloween cookies, and I have a little more to do this week. I'll try to do a Halloween blog post later this week with all the ideas.
Have a great week!


 Posts
Posts