Tuesday, January 4, 2011

Hats Off to Whoopie Pies!

Is it only March that can come "in like a lion"? Our New Year roared in with a sudden heat wave...from 20 degrees to 60 degrees in just a day. The snow melted, and all the little creatures came out to forage. This fat squirrel waddled over to my viburnum bushes to nibble on the tender buds.

I was able to do a little yard work, pulling up old, dry flower stalks and tidying up the garden. I didn't see any hibernating insects in the gnarled roots, but I did turn up one stunned earthworm, who slowly, methodically worked its way back into the soil.

January means sale time at my favorite pottery store, Emma Bridgewater in England. Their pottery is all hand-decorated and the quality is second to none. I can't afford to buy a set of her dishes, unfortunately, but I wait every year for her "Second Hand Sale" and shop with a little less
guilt. My new favorite is her "Birds of Britain" collection. With my recent order, I now have 12 mugs, and love them all.

On the home front, Tabitha is broadening her horizons. She's learned to jump up onto the window sill in order to watch the birds at the feeders...

...and she's discovered the small screened-in opening on our front porch. She spends a lot of time there, nose to the screen.

What an inquisitive girl she is!

I finished up the last of my gift knitting for the year with this small slouchy hat, made for a friend's daughter. The pattern is Ripley by Ysolda Teague. It was easy to modify this pattern for a child...I just went down 2 needle sizes. It's a clever pattern, with an old-fashioned lace brim and a gathering of fabric at the name of the neck.

I have an adult-sized one for myself and I'm quite fond of it!

I'd been hesitating to start a particular knitting project. I never want to feel afraid to try new knitting techniques, but sometimes I do feel overwhelmed, especially with no one here to help me. I rely a lot on youtube videos and Ravelry.com for support, and I practice, practice, practice. I wanted to start on another pair of toe-up socks this week. I remember how I used to avoid patterns with this style, and I'm glad I was able to teach myself, although it's still awkward. This youtube video by Cat Bordhi was a big help.

First, drape your yarn...

Then, using a modified long-tail cast on, you'll pick up wraps with your left and right needle until you've got enough stitches on your needles, like this:

You can see the little purl bumps that formed on the other side of your wraps.

Next, you'll knit up and down these two needles, increasing as needed, in a circular pattern until you have the specified number of stitches. Now you can really see the toe forming. I always end up with my purl bumps on the OUTSIDE instead of the inside, but it's just one row and I don't mind a toe made this way.

Here's the inside of the toe.

Many patterns for toe-up socks call for the Magic Loop method, which uses one long circular needle or two smaller circular needles. I prefer using double-pointed needles, so I just mark either side of my toe with a stitch marker to keep my place. I work in additional needles as the toe grows, until it's completed, and you're ready to move on to the foot:

I really enjoy learning these new techniques. I'll check back as I inch toward the heels!

I read many different food blogs, and lately I've noticed a trend toward indulgence. Many dessert blogs boast of their use of real butter in recipes, with lots of white sugar and egg yolks. I've shuddered, reading about cupcake recipes that call for two sticks of butter and heaping cups of sugar, topped with buttercream frosting made of additional sticks of butter and cups of sugar. To those of you who can eat this way and still roll yourself out of bed in the morning, I applaud and envy you. I personally have to continue to seeks ways to lighten old favorites so that I can enjoy the taste, but not live life in a constant sugar coma.

Which brings me to a new recipe. I read about Lemon Whoopie Pies on Joy the Baker's excellent website, and was intrigued. I was less enthusiastic about the thought of consuming 2 sticks of butter and a total of 3 3/4 cups of sugar, so I made some modifications and I'm really pleased with the result.

Modified Lemon Whoopie Pies
Adapted from Joy the Baker
Makes 24 pies


Cookies
1 1/2 cups white flour (all purpose)
1/2 teaspoon baking powder
1/4 teaspoon baking soda
1/4 teaspoon salt
6 tablespoons room temperature unsalted butter
3/4 cup sugar
1 teaspoon lemon zest
1 egg white
1 tablespoon fresh lemon juice
1 teaspoon vanilla extract
1/2 cup buttermilk (skim)

Filling
1 block (12 ounces) neufchatel cheese
5 tablespoons sugar
1/2 teaspoon vanilla
1 teaspoon lemon zest
1 - 3 teaspoons lemon juice (to taste)

Preheat oven to 350 degrees. Mix together flour, baking powder, baking soda, and salt, and set aside. In a separate bowl, beat together butter, sugar, and lemon zest until smooth. Add egg white, lemon juice, and vanilla and mix well. Slowly blend in half of the flour mixture, and then add your buttermilk. If you don't have any on hand, it's easy to make: 1/2 cup milk + 1/2 teaspoon vinegar (let it sit for 5 minutes to curdle). Finally, add the rest of the flour mixture and incorporate.

I originally had planned to use the cookie cutters my sister-in-law had given me for Christmas to make tiny, dainty circles, but this batter is much too sticky. I settled for dropping 1/2 teaspoon of dough onto a greased cookie sheet, and baked for about 8 minutes.


I still expected little dainty circles, but the resulting cookies were fairly substantial. They definitely had character.

I cooled them on wire racks for about 1o minutes while I prepared the filling, which was simple: I dumped all ingredients in my KitchenAid and mixed until fully incorporated. Easy! Then I turned over my cookies to prepare for filling.

I put a generous dollop of filling in each cookie and then smooshed them together to make a little whoopie pie.

They were perfect! Soft and chewy, with a crispy rim. The lemon flavor is very subtle, and the sweetness is not overpowering. I'm really pleased with these...and this recipe makes 24 whoopie pies, which means that I won't have to worry about dessert for a while!

I hope you give them a try.

Enjoy!

Tuesday, December 28, 2010

...and a Happy New Year!

Merry Christmas! It's been a blur of friends, family, and pajama breakfasts (and some suppers!). Somehow, I managed to get my homemade Christmas cards out on time. I have a rediscovered love of rubber stamps, which originated with many lost hours spent at my grandpa's miniature printing press.

However, the house was sadly lacking in Christmas cheer. We have boxes and boxes of Christmas decorations...stockings, ornaments, a big wooden advent calendar, and lots of things that dangle from hooks and doorways...but everything was in storage. We didn't get a tree this year, but I felt like I should contrive a way to liven things up without spending a lot of money or emptying out our storage unit.

Candy canes are cheap and festive, and awfully cute when tied in the shape of a heart.

I made a small table centerpiece with some things I had lying around. Alas, I didn't get a chance to make miniature holly ties for the candles, which would've completed the picture, but I'm satisfied.

I had some pine cone garland with light green wooden balls and twists of twigs that I rescued from a forgotten shelf and strung up in our sun room.

Two years ago, inspired by Laura Ingalls Wilder's idea, I made a button string. It's been languishing in a basket, but made a cheerful border for our big picture window.

I leave these yellow fabric stars up all the time, because I love stars and dangling things. However, I added some wooden ornaments that I'd picked up at Crate and Barrel a few years ago, that were sitting in a bowl, ignored, on the back of a high bookcase.

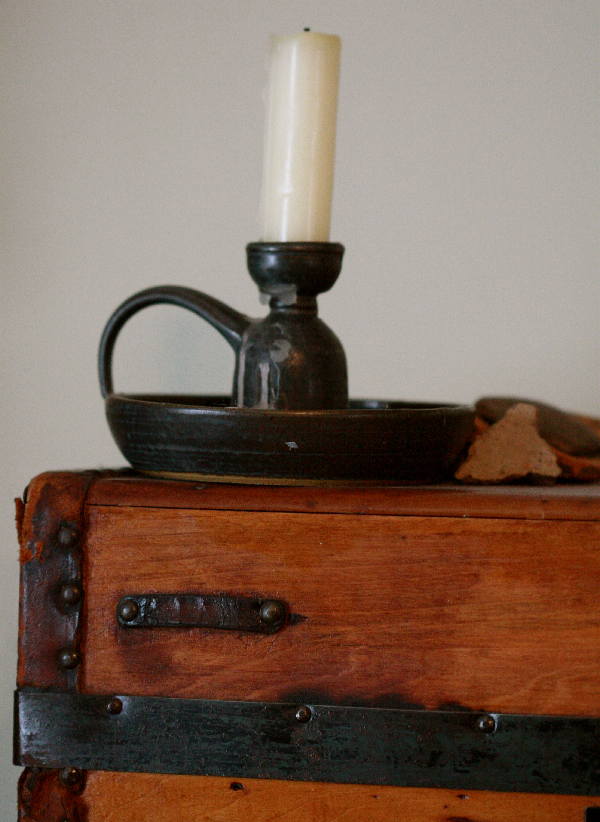
I brought out copious amounts of candlesticks. They were made at Wirth Pottery in Germany, by a little old potter in the hills. Every trip I've taken there, I've bought more of them. They're functional, and I love how rustic and natural they are. Again, miniature springs of holly would've been an improvement, but I was still happy to have them.

A string that had been in the kitchen (if it's star-related and dangles, I have it up all year round!) was relocated to the living room.

A pine cone wreath from our bedroom was pressed into service.

Todd brought home 3 big poinsettias, and I stacked them on boxes of varying heights to make a tree of sorts. I filled in the gaps with my house plants: 2 different types of ivy. It made a very nice display!

The poinsettia originated in Central America. It was brought to the United States in the early 1800s by a man named Joel Robert Poinsett. Believe it or not, the red "flower petals" of a poinsettia are actually the leaves. These small yellow centers are the actual flower.

The birds got a Christmas treat, too, with a new suet cage. They seem pretty pleased with it!

"Goodwill toward men" applied to our cats these past weeks. I've caught them napping together several times...

...and could this be called anything but a snuggle?

I discovered a new yarn that I'm absolutely wild about, a mint and cream sock yarn in soft wool that makes me think of snowflakes. It was sold in GeminiKnits' etsy store a few years ago, but I contacted the owner and she is kind enough to dye a new batch for me.

Knit up, it makes very pleasing stripes. I plan to order enough to make a simple cardigan. I can't wait!

Now that Christmas has come and gone, I can post photos of my knitted Christmas gifts to friends and family.

A cardigan for my mother-in-law:

A hat and matching gloves for my sister:

Socks for my stepfather-in-law:

Socks for my sister-in-law:


A hot water bottle cover for a friend:


A sweater for my sister (yes, that is an OWL yoke!):


Heart socks for my husband:

Fingerless gloves for a friend:


Socks for a friend:

A hat and mittens for my nephew...

...and also this owl!

Phew! I feel like I've done a LOT of knitting in 2010. When I added it up, I realized that I've knitted 28 items over the course of the year. Next year, I'll probably knit a lot less, since I'll be focusing on my knitted blanket and a few miscellaneous gifts.

There's Christmas decorating and Christmas knitting, but the star of the show for me is Christmas baking. Normally I bake up a storm during the holidays, but I'm trying to keep things healthier around the house...a little less butter and sugar. I found a recipe that was really delicious that didn't contain any butter, and very little sugar, relatively speaking.

Pumpkin Roll
Adapted from Allrecipes.com
10 servings

For the roll:
3/4 cup flour
3/4 cup sugar
2 eggs
1 egg white
2 teaspoons pumpkin pie spice
1 teaspoon baking soda
1 cup pumpkin puree
1 teaspoon lemon juice

For the filling:
2/3 cup (5 ounces) neufchatel cheese, softened
4 tablespoons sugar
1 - 2 tablespoons sour cream or yogurt
1 teaspoon vanilla
1/4 cup crystallized ginger (optional)

Preheat oven to 375 degrees. I didn't have the jelly roll pan called for in the recipe, so I greased and floured a 9 x 12 inch cookie sheet. Mix together flour, sugar, baking soda, and pumpkin pie spice, and then stir in the pumpkin puree, eggs, egg white, and lemon juice. Pour into pan and spread to cover evenly. Bake for 15 minutes.

I was a little nervous about this next part, but it worked out just fine. Sprinkle a tablespoon or two of powdered sugar on a damp, clean dish towel. Run a spatula along the edges of your roll to loosen it, then take a deep breath and turn the cookie sheet over onto the towel.

Success!

Next, very carefully roll up the towel with the pumpkin rectangle inside. Let it cool for about 30 minutes.

Go ahead and make up your filling. I originally used 4 tablespoons of yogurt, which made the filling too runny...but it didn't detract from the taste. I recommend using only a tablespoon or so, depending on how thick you'd like the filling.

Unroll your dishcloth and spread the filling evenly over the cake. Then, roll it back up, sans dishcloth.

Don't be afraid! I creased the edges of my roll to make it easier to work with.

The end result was runny, messy, and delicious. The roll seemed to grow more moist by the day...not that it lasted more than two or three days. I'll make it again soon, with the thicker filling. What a way to get your veggies! ;)

I hope everyone had a wonderful Christmas. I'll see you next year!