Tuesday, January 28, 2014

French Toast of the Town

The conversation I shared with Todd last Saturday morning is typical of our normal "pillow talk":  Mmmmm, I haven't had french toast in years!  I would love to have a slice for breakfast.  Sad but true, we spend a nice bit of time talking about food!  Thankfully, I've gradually developed a new philosophy about healthy eating:  do well 80% of the time, and indulge the other 20%.  I'm done with light ice cream, butter, sour cream, and bread.  I eat full fat, and on a regular basis, but I'm careful to balance that with fruit, vegetables, nuts, and tons of exercise.  In that spirit, I decided that some decadent french toast was in order.  Good french toast, of course, starts with good bread.

I've been somewhat disappointed with the results of my bread-making in the past.  Loaves seemed dense, and they didn't rise much.  I gradually stopped trying.  This time, though, I was determined to crack the good-loaf code.  I went to reliable sources (Annie's Eats for the bread recipe, and King Arthur Flour for bread-making tips and videos) and studied up.  I realized that I've been making quite a few mistakes.  I'll walk you through them here, and show how I was able to take my bread-making to a new - and tasty - level!  You don't need a bread machine or fancy equipment to have fantastic bread.

The Best White Bread
Annie's Eats
Yields 2 loaves

Ingredients
4½ tsp. instant (rapid rise) yeast
¾ cup plus 2 2/3 cup warm water, divided (105-115˚ F)
¼ cup granulated sugar
1 tbsp. salt
3 tbsp. unsalted butter, at room temperature
9-10 cups all-purpose flour

Directions
(Note:  I halved the recipe for our needs, and only made one loaf.  The directions are the same, with the exception that full-recipe doughs will need to be split in two and folded into their respective loaf pans.)

Dissolve your yeast in 3/4 cup of warm water. 

MISTAKE #1:  I knew that "hot" water kills yeast, but I believed that it was important to have fairly hot water to activate it.  You really just need warm water to get it going.

Stir in the rest of the water and the rest of the ingredients, but only stir in 5 cups of flour.  Mix in the rest a cup at a time and either hand- or machine-knead for 6 - 8 minutes.  Your dough ball should feel sticky, but it shouldn't stick to your fingers.  Add more flour if it feels too sticky.  Place it in an oiled bowl, cover, and let rise in a warm place until doubled, about an hour.

MISTAKE #2:  My oven has a WARM setting of 175 degrees.  Perfect for bread dough, right?  Not so much.  I learned that the optimum temperature is 90 degrees.  Really, you should turn on your oven for about 20 seconds and then turn it off.  It doesn't need too much warmth to get going!  Again, too much heat kills yeast, and then your loaf won't rise.  

After an hour:


You should be able to leave a nice finger indentation if you press it.


When you dump your dough out on a floured surface, you should be able to see all the nice holes created by your active yeast:


Pat your dough gently into an oval shape.


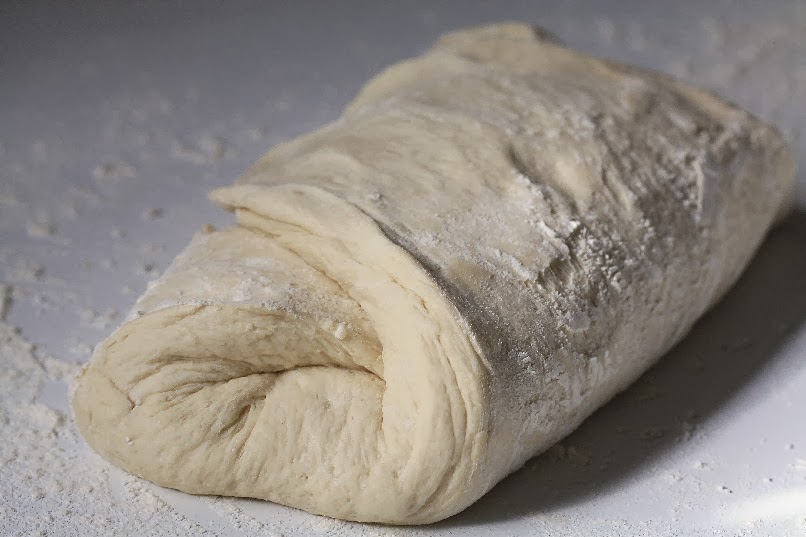
Fold one third over and lightly seam it so it will stay:


Fold the opposite third over and do the same:


Roll the ends under a bit and put your loaf seam side down in a greased loaf pan.  Gently press the top down to ensure that the dough fills the pan evenly.


MISTAKE #3:  Previously, I just patted my loaves into loaf-shaped dough balls, without this proper shaping.

Preheat your oven to 375 degrees (the Annie's Eats recipe says 400, but that seemed a bit high to me, so I decided to err on the side of caution) and let your dough rise in a warm place for about 35 - 45 minutes.  A good tip I read was to microwave a cup of water until the water boils, then place your covered loaf pan in the microwave with the cup.  The steam creates the perfect temperature for rising:


I was pretty bowled over by this massive rise!  It's the best I've ever gotten. 

Bake your loaf for 30 minutes.  To be sure it's done, pop it out and thump on the bottom.  If it sounds hollow, it's done!  And so beautiful.


MISTAKE #4:  cutting into a loaf after just a few minutes.

I learned to wait at LEAST 30 minutes before cutting into fresh-baked bread.  The inside will be a bit drier, and you'll be less likely to crush it when you slice it.  It seems to taste better that way, too!

Fresh-baked bread makes the MOST incredible bread pudding, grilled-cheese sandwiches, and...french toast.


I hope you'll give it a try this week.  I felt a real sense of accomplishment (problem solving!  Mastering new skills!), and nothing smells or tastes better than a slice of freshly-baked bread.

Have a great week! 


Tuesday, January 21, 2014

Ginger-snap to it!

The freakish cold spell we've had recently has killed the open camillas and kept us inside on the weekends.  Todd has been busy with our new table saw.  He's built shelves in three closets, in the laundry room, and three series of large-scale shelf-like structures for some of his larger collectible items.  I've never thought much about closets before, but I have to admit that adding shelves (and a coat of paint) has really maximized the space.

Before (a dull yellow):


Todd adding some wire shelving to the wooden supports he'd built:


The final product:


There are also shallow shelves for DVDS going all the way up the left wall.  Amazing!

Meanwhile, since I've been doing daily to-do lists, I've discovered endless small projects.  I've done a massive clothing sort, preparing 6 garbage bags-full for Goodwill.  Found:  some moth-eaten hand-knit gloves.


 Drat!


I've tidied up my sewing machine area and threaded the bobbin, which allowed me to complete a large stack of sewing projects.  I've spring-cleaned the house.  I sorted through 20 magazines, taking articles of interest from each one...


...to be filed into my craft binders.


All kitchen baking supplies have been separated into separate plastic binders and labeled.  All candles have been separated out by type, boxed up in clear plastic shoe boxes, and labeled.  All fabric and kitchen linens have been sorted and labeled.  Holiday boxes have been sorted and organized.  I tell you, to-do lists are amazing!

I did find time to complete a puzzle...


...or two.


I've been buying fresh flowers for my favorite new Emma Bridgewater vase:


...and forcing hyacinths, which I love to do in January.


I've also been baking - a lot.  Unfortunately a corrupted memory card means that I can't show you the chocolate fudge brownies with chocolate chip cookie dough frosting and drizzled chocolate, but I did save the much healthier pumpkin gingerbread tart.  It was delicious - so much better than traditional pumpkin pie.  This recipe is a mix of several other recipes, and a lot of the measurements are "eyeballed".  Here goes!

No-Bake Pumpkin Gingerbread Tart
(heavily adapted from Ezra Pound Cake)

Filling Ingredients
1 cup pumpkin puree
8 oz reduced-fat cream cheese
2 tablespoons butter, softened
1 teaspoon vanilla extract
1/4 teaspoon of cinnamon
1/4 teaspoon of cardamon
1/4 teaspoon of ground ginger
1/4 teaspoon salt
1/2 - 3/4 cup powdered sugar

Crust Ingredients
3/4 - 1 cup gingersnap crumbs
2 - 3 tablespoons butter, melted

Directions
Preheat your oven to 400 degrees.  The pie is not baked, but the crust is.

First, crush your gingersnaps.  I used one whole package of Anna's Ginger Thins, but any type would work.  Add your melted butter and mix with a fork until it holds together and can be pressed down.  Then, add the mixture to your 9" tart pan and press evenly across the bottom and around the sides.


Bake at 400 degrees for 6 - 8 minutes.  Remove from oven and let cool. 

Meanwhile, toss all but the sugar into your mixer bowl and beat until smooth.  Slowly add your sugar.  When everything is combined, spoon into your cooled crust.


Smooth it all out, and refrigerate it for several hours.  You're done! 


 I think it's a lovely dessert.


 I found this clearance glass cake stand at a thrift store for $5.  A perfect excuse to use it!


I used the full 3/4 cup powdered sugar in this one, and I calculated 10 servings at 230 calories per serving.  Not bad at all, although I may have - ahem - cut rather generous portions when I served this.  Anyway, I hope you'll give it a try...it's a nice, spicy treat.

Have a great week! 

Tuesday, January 14, 2014

sound trumpets for crumpets!

One new organizational method I'm trying out this year is making daily lists of things I ought to get done, instead of running from project to project without completing anything, or sitting glazed-eyed in front of the computer for too long because I forget what needs to be done.  Suddenly, my productivity has tripled, which miraculously leaves more time for my leisure projects, like knitting.  It's only January 14th and I'm already halfway through a pair of socks, and I've just completed a pillow.

The pillow was an interesting project.  Whatever it may say about my personality, I'm not one of those people who view patterns as a rough guide, adding their own personal touch here and there.  I never, ever deviate from a pattern.  I'm no knitting expert, and I prefer to hold the guiding hands of those who are.  But when you make something like a pillow, well, you don't really need a pattern.  Here's where it gets fun.

I pulled out Barbara Walker's Treasury of Knitting Patterns and chose a stitch pattern that I rather liked.


I ordered some bulky yarn in Cadet from Knitpicks, because I thought it would accentuate the blue in the plaid pillows we have on our living room couch, and also look fine with the cream and tan ones.  I cast on 50 or so stitches and started right in.

Before long, I noticed that my knitting, bunched up as it was in its pre-blocking state, didn't really resemble the pattern.


When I double-checked, I realized that I was knitting lines 1 - 9, and hadn't realized that the pattern continued on the next page, lines 10 - 20.  Therefore:  zig zags.  I'm not really a fan of that pattern, but I'd put too much work into it to quit.  I finished it up with a straight stockinette back, and found some blue linen fabric that was a close-enough match.


I sewed a quick pillow form and stuffed it with polyfil.


I pinned the knitted fabric around the form and used mattress stitch to close it all up.  Mattress stitch secures two pieces of knitted stockinette fabric seamlessly, but because one side wasn't stockinette, it left a seam.  Still, it was very tidy.  One of my biggest problems with sewing knitting pieces together is how messy and unprofessional it looks, but I'll always use mattress stitch from now on.


Here is the top:


...and here is the bottom.


Even if it didn't turn out the way I'd planned, I'm enormously pleased with the project.  I made up my own pattern, chose my own color, sewed a pillow form that actually looked like a pillow, and was able to stitch my knitted fabric around said pillow form.  Hooray for small victories!

Another little victory:  finding an amazing crumpet recipe.  I got hooked on crumpets when I visited Scotland over a decade ago, but couldn't find them here.  Something made me think of them recently:  I haven't had a crumpet in years!  Crumpets are somewhat similar to english muffins, but much, much better.  They have a bit of a sourdough tang, and it's unnecessary to slice them open.  They're full of little holes that fill up with your chosen topping:  honey, jam, butter, etc.  They're soft and flavorful and flat-out amazing.

Please visit this King Arthur Flour page for the recipe, but I'll run through the steps here.

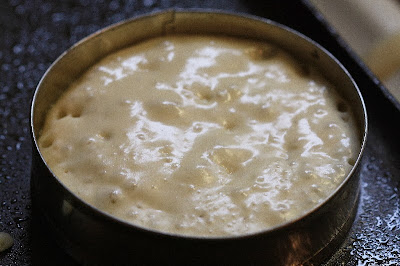
You mix up your ingredients and let the dough rise for an hour, until doubled.  Heat up a pan or griddle and grease your crumpet rings.  I read that you can also use a cut-off tin can, but that sounds sort of dangerous.  I got 4 rings on Amazon for $10, and I think it's a worthwhile investment!  Your wet dough - full of holes and stretchy, like sourdough, is going to be spooned (about 1/4 cup each) into the greased rings.


You cook them on medium heat for about 5 minutes, until they're delightfully bubbly on top.


Use tongs to pull off the ring.


It will hold its shape at this point.  Oh...see those holes?  :)

Flip!


They are a nice golden brown.  Only cook them a few minutes on the other side...and you're done!


You can cut them open like english muffins...


...but I prefer the top-slather.


I cut the recipe in half, which made 9 crumpets...that did not last beyond the first day.  They're also good to slice open and fill with meat and cheese, so there's no reason you can't have crumpets for breakfast, and lunch...and supper.

Whip up a batch before the next episode of "Downton Abbey" and feel like a real Brit! 

Enjoy!

Tuesday, January 7, 2014

a wee bit o' Scotland

Todd and I were recently in Oregon for the Christmas holidays, and we were able to squeeze in one of my favorite things...a trip to the coast.  It doesn't matter if it's cold (it always is), or raining (it always is).  I spent my summers in Seattle growing up, and have developed a real love of the Pacific Northwest coastline. 


I much prefer it to the smooth, tame beaches of the east coast. 

Here is Haystack Rock, a famous landmark:


But there are lots of smaller rock formations, just as nice.


No matter what the weather, people bring their dogs to play fetch in the surf.


I get such a kick out of watching them play.


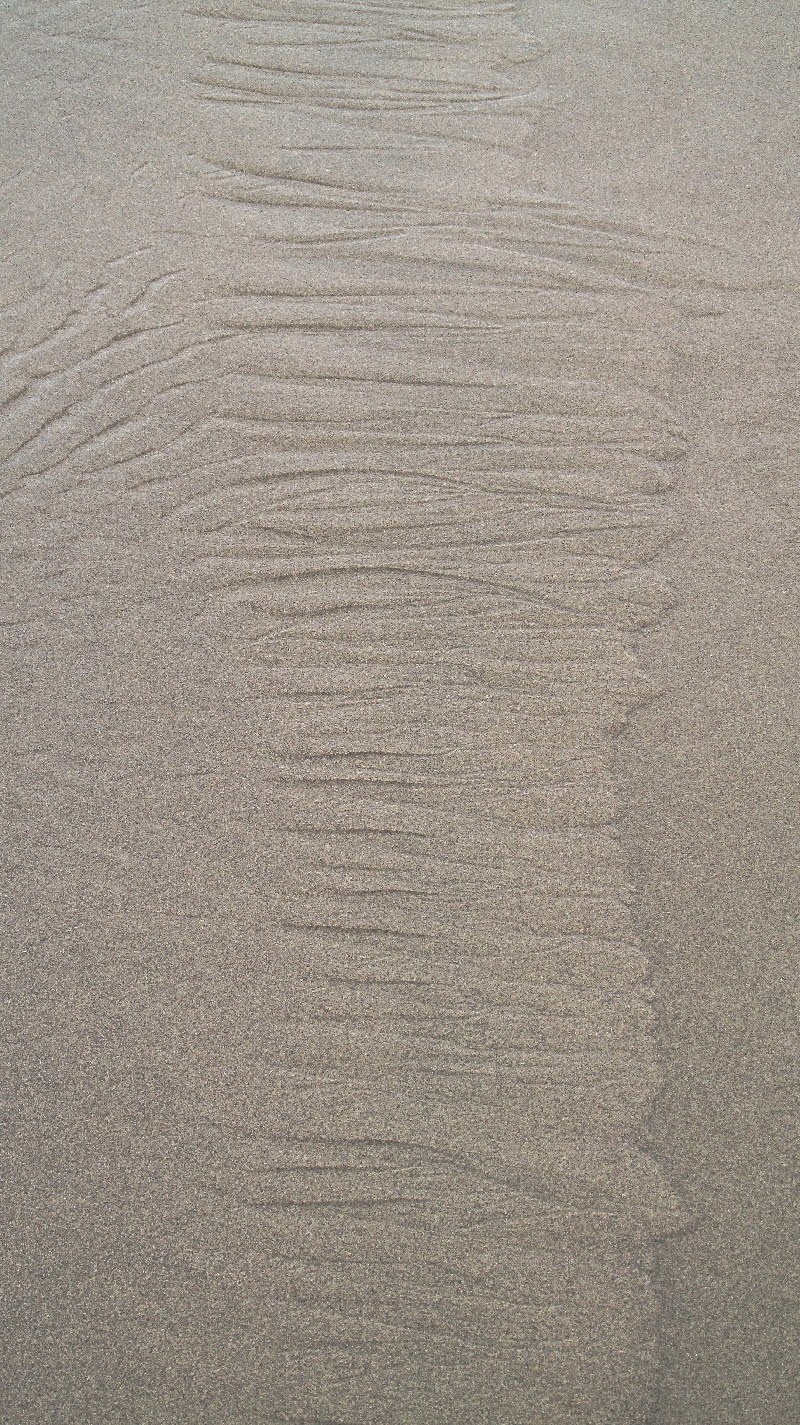
When the tide goes out, beautiful sand formations are left behind:


Of course, some are man-made.   Beam me up, Scotty!


The Pacific Northwest coastline has lots of beautiful rock formations in lovely deep colors.


Sea caves, carved out by the surf:


Barnacles and mussels grow on every available surface:


I joked to Todd that these long white things were "Neptune's fingers", but they are really gooseneck barnacles.


As much as I love the popular coastline...


...Todd introduced me to a new place several years ago that seems almost magical to me.  It's Cape Meares, an estuary on the northern coast (an estuary is a place where salt water and fresh water merge).  It reminds me so much of Scotland:


Lots of boggy ground covered with thick tufts of grass...


...that lay flat after the tide goes out.


All sorts of little birds gather here, and deer, too, I see:


If you take the long road, a nice 1 1/2 mile walk, to the coast, you'll pass these boggy lands on your right.  You'll eventually come to a forested path...


...which leads up a steep hill, through thick sea grasses...


...to a lovely beach.


It's almost always completely deserted, because I think most people drive past this to get to the Cape Meares lighthouse.  But we aren't interested in lighthouses.  We'd rather take a long walk at the water's edge. 


We're always cold and wet after our day at the coast, but it's part of the whole experience for us.  We're already looking forward to our next coastal trip. 

Have a great week!