Showing posts with label diy cards. Show all posts

Tuesday, May 21, 2013

Shoots and Roots

Another week, another walk through the garden.  The japanese irises are still blooming nicely.  They make lovely, though short-lived, bouquets.


A row of small neat bushes, formerly anonymous-looking, started putting out spiky pink flowers.


Up close, they're so beautiful.


I was delighted to see a small patch of lungwort.


These spread nicely and love shady areas.  Only two plant are blooming and I'm going to leave them alone this year.  Next year, I'll dig some up and move them to the front yard.  They have small, jewel-like flowers that I really enjoy.


I've loved seeing hostas pop up in unexpected places...


Pretty vines with variegated leaves...


Even lilies!


I normally don't pay much attention to the back yard beyond the driveway.  It's mainly overgrown with ivy and just reminds me of all the work we need to do there.  But I did notice this beautiful bush had bloomed.  At first I thought it was spirea...


...but the flowers aren't quite right.


I'm absolutely delighted with it!

I'm also excited at the way the "Golden Carpet" sedum is cascading over some of the stone walls.


I picked some to try to start roots, so I can plant it in other parts of the yard.


I've had good luck with this method.  Several weeks ago, I put some "Autumn Joy" sedum leaves in soil and kept it moist.


One leaf died, but four survived.  I saw a tiny green sprout at the base of one of the leaves and knew they were ready for a transplant.


The others didn't have sprouts, but resisted when I gave them a gentle tug.  Sure enough, they'd formed roots.


I repotted these and several other sedum that had rooted.


These sedums cost around $7, so I was pleased to be able to multiply my 'stock' for free!

Creeping Jenny, too, is easy to propagate in water, and is one of my favorite green plants.  It should root in a glass of water within a week!


The little Carolina wren eggs on our front porch have hatched.


Mama seems to only visit the nest at night, but I guess she knows what she's doing!

I've been seeing some interesting insects, like this mystery creature who watched me through the glass while I worked this week...


I've seen some beautiful spiders, like this one (type unknown) who made a tidy nest between some bushes:


And this funnel web spider, who made a clever ground web that hinges on a stiff, dry magnolia leaf:


I'm keeping an eye out for more!

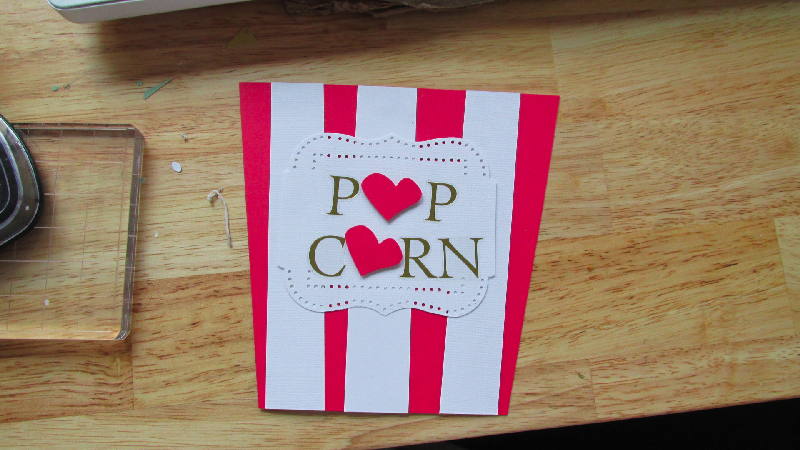
I've made some cards recently, and although the pictures were taken quickly and in poor light, hopefully you can get the general idea.

A birthday card for a cousin, stamped, using sewing thread to 'anchor' the paper-cut balloons:


Another birthday card with a center cut-out:


The candles are double-sided and suspended on white sewing thread so that they can rotate.


I've done little baking, but I can pass along this modified "healthier cheesecake" recipe that I toyed with recently.  It's not exactly cheesecake, but it's close enough to pass the test with me when I want something sweet and relatively guilt-free.

No-Bake Pumpkin Cheesecake
Modified from Ezra Pound Cake

Crust: 
1 cup graham cracker crumbs (9 full crackers)
4 tablespoons butter, melted
1 tablespoon sugar
1/4 teaspoon cinnamon

Filling:
1 cup pumpkin puree
4 tablespoons butter, softened
2 eight ounce packages of Neufchatel cheese, softened
1 teaspoon vanilla
1/4 teaspoon nutmeg
1/4 teaspoon cardamon
1/4 teaspoon cinnamon
1/4 teaspoon salt
3/4 cup powdered sugar

Directions:
Preheat your oven to 400 degrees.  Mix your crust ingredients and press into a 9-inch pie pan.  Bake for about 7 minutes, and let cool completely.

To make the filling, combine pumpkin, butter, neufchatel cheese, vanilla, spices, and salt and beat until smooth.  Stir in sugar 1/4 cup at a time and combine well.  Spoon into graham cracker crust and chill thoroughly.  


You can adjust the sugar if it doesn't taste quite sweet enough.  It's a unique flavor but by my second piece, I was hooked!

Hope you give it a try.  Have a great week!


Saturday, February 23, 2013

Paper Puttering

It's a chilly, rainy Saturday, and the perfect day to put out that extra blog entry that I'd been thinking about.  I know I spend a lot of time talking about cooking, or knitting, or gardening, or birds/nature, but I have a lot of other hobbies.  One that I especially enjoy is card making.  I've been making silly cards since elementary school, and now I can really indulge myself because I finally have...a craft room.


It's changed quite a bit since this photo.  I now have a rug, and some window coverings, and a temporary cover for the blue chair.  This angle, too, leaves out a wall of rubber stamps, knitting cabinet, and craft paper supplies.  But you get the idea.

I love it.  


I'll include better and more complete photos when it's done, but here I basically have an L-shaped work station for my card-making and eBay work.  The side table has a sewing machine and all of my fabric is stored beneath.


I am addicted to paper cutters - absolutely addicted.  I bought these iron towel racks at IKEA for around $1.75 each, I believe, and Todd mounted them on the side of a large cabinet for easy access.


The cabinet itself (from IKEA's discount room, for missing doors) holds a row of binders, half of which contain organized acrylic rubber stamps (the rubber stamps without wood mounting) and the other half containing the gardening/decorating/project idea clippings that I've been keeping since I was 15.  I have labeled boxes for sewing, embossing, blank cards and books, inks, stampers, glues, glitters, paint/painting supplies and colored pencils, buttons, ribbons, chipboard, stickers...can I say that my husband has an incredibly organized mind and planned the layout, and basically everything else?  He's amazing! 

So I have these supplies, and now, when I feel inspired, everything is organized and at my fingertips. 

I wanted to show you "the evolution of an idea" when it comes to cards.  In this example, I used Groundhog's Day as an excuse to make a silly card for Todd.  Groundhog, groundhog, I thought.  What can you do with a groundhog?  I started thinking about how a groundhog might be fairly inconsequential for most of the year, but one day only, he had everyone's attention, and all the control.  It reminded me of that old He-Man cartoon, where the main character holds aloft his sword and intones, "I HAVE THE POWER!"  Boom!  An idea formed.

First, the groundhog.  I don't have a groundhog cutter, of course, and I'd be hopeless at trying to cut out the shape with scissors.  The great thing about paper cutters is that they can frequently be used for shapes other than the intended one.  I used an ornament cutter for the head, and an owl for the body.


See?  I just cut off the feet and ears and rounded the body a bit.  I used a hole punch for the eyes and ears.  The only thing I fashioned by scissors was the teeth, and let me tell you, that took longer than everything else put together.


I used the rounded curve of a spiral cutter to make the feet/legs and just trimmed them up with scissors.


I hand-cut a He-Man costume and hair.  It was simple and didn't take too long.  By the way, I sometimes make two cards so that I can give the better one to the recipient, which is why you see two groundhogs!

A He-Man groundhog must have a sword...


...and a sign denoting the special day.


Does it work?  It doesn't have to be perfect...it just has to be close enough so that the recipient "gets it".


I placed him on a card next to his two options, early spring or more winter.  The cloud, the snowflakes, and the sun were all cut with paper cutters.  I only had to manually cut out the sun rays.


I used an alphabet paper cutter to make the words...


...and another paper cutter to make this zig-zaggy outline.  The cutter made "the hole" and then I used scissors to cut around the hole, making a great shape for impact.  I glued white paper behind it and cut off the extra.


The front of the card...


The inside...


Now I could've - and should've - done something more dynamic with the background.  I ran out of time, though, and I was fairly happy with how it turned out.  Todd immediately recognized the He-Man connection and loved the card...success!

Sometimes I come up with ideas on my own, and sometimes I crib from Pinterest.  I saw a photo of a vintage Valentine card there and copied it completely for Todd's Valentine.  The card concept is a box of popcorn with the silly tagline:  "I'm gonna POP you a CORNY question...will you be my Valentine?"  I love silly, so I got to work.

First:  I wasn't about to hand-cut an infinite number of popcorn bits.  I have a cloud paper cutter, so I cut out the shapes and trimmed them a bit to look more popcorn-like.


They looked indistinct, white on white, so I decided to trace around the shapes with a black Sharpie.  Much better!  I had a pile of popcorn in no time.


I used my paper slicer to cut red stripes for my all-white rectangle of paper, used another paper cutter to make the background label, and stickers to make the word POPCORN.


Then I just glued the popcorn on, layer by layer...


I glued the completed box of popcorn onto a piece of pink construction paper and used glitter stickers for the impact words.  My own personal touch was adding "will you be my valentine?" on ribbon banners that I rubber stamped, cut out, and glued to the bottom of the popcorn box.

Here she is!


I am very pleased with how it came out!

Alas, my desk area usually looks like this or much worse after a card-making session:


Anyway, there you have it.  Whether you come up with a concept yourself or find inspiration elsewhere, I hope that you have fun being creative this week and do a little "paper puttering" of your own!