

It's changed quite a bit since this photo. I now have a rug, and some window coverings, and a temporary cover for the blue chair. This angle, too, leaves out a wall of rubber stamps, knitting cabinet, and craft paper supplies. But you get the idea.
I love it.

I'll include better and more complete photos when it's done, but here I basically have an L-shaped work station for my card-making and eBay work. The side table has a sewing machine and all of my fabric is stored beneath.


The cabinet itself (from IKEA's discount room, for missing doors) holds a row of binders, half of which contain organized acrylic rubber stamps (the rubber stamps without wood mounting) and the other half containing the gardening/decorating/project idea clippings that I've been keeping since I was 15. I have labeled boxes for sewing, embossing, blank cards and books, inks, stampers, glues, glitters, paint/painting supplies and colored pencils, buttons, ribbons, chipboard, stickers...can I say that my husband has an incredibly organized mind and planned the layout, and basically everything else? He's amazing!
So I have these supplies, and now, when I feel inspired, everything is organized and at my fingertips.
I wanted to show you "the evolution of an idea" when it comes to cards. In this example, I used Groundhog's Day as an excuse to make a silly card for Todd. Groundhog, groundhog, I thought. What can you do with a groundhog? I started thinking about how a groundhog might be fairly inconsequential for most of the year, but one day only, he had everyone's attention, and all the control. It reminded me of that old He-Man cartoon, where the main character holds aloft his sword and intones, "I HAVE THE POWER!" Boom! An idea formed.
First, the groundhog. I don't have a groundhog cutter, of course, and I'd be hopeless at trying to cut out the shape with scissors. The great thing about paper cutters is that they can frequently be used for shapes other than the intended one. I used an ornament cutter for the head, and an owl for the body.

See? I just cut off the feet and ears and rounded the body a bit. I used a hole punch for the eyes and ears. The only thing I fashioned by scissors was the teeth, and let me tell you, that took longer than everything else put together.

I used the rounded curve of a spiral cutter to make the feet/legs and just trimmed them up with scissors.

I hand-cut a He-Man costume and hair. It was simple and didn't take too long. By the way, I sometimes make two cards so that I can give the better one to the recipient, which is why you see two groundhogs!
A He-Man groundhog must have a sword...

...and a sign denoting the special day.

Does it work? It doesn't have to be perfect...it just has to be close enough so that the recipient "gets it".

I placed him on a card next to his two options, early spring or more winter. The cloud, the snowflakes, and the sun were all cut with paper cutters. I only had to manually cut out the sun rays.

I used an alphabet paper cutter to make the words...

...and another paper cutter to make this zig-zaggy outline. The cutter made "the hole" and then I used scissors to cut around the hole, making a great shape for impact. I glued white paper behind it and cut off the extra.

The front of the card...

The inside...

Now I could've - and should've - done something more dynamic with the background. I ran out of time, though, and I was fairly happy with how it turned out. Todd immediately recognized the He-Man connection and loved the card...success!
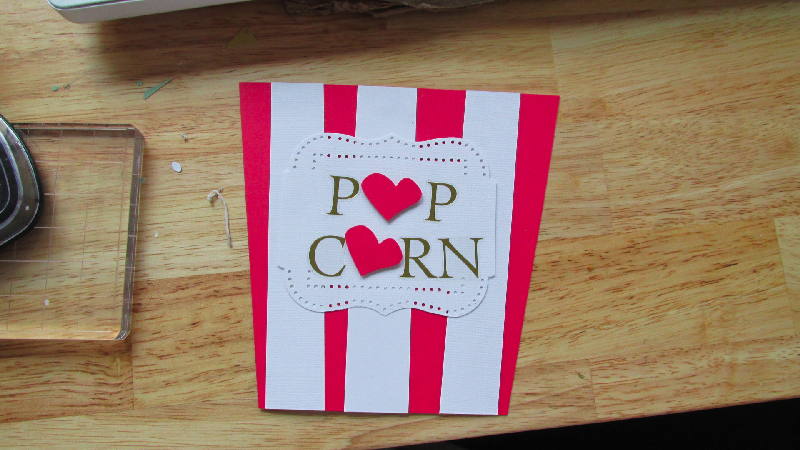
Sometimes I come up with ideas on my own, and sometimes I crib from Pinterest. I saw a photo of a vintage Valentine card there and copied it completely for Todd's Valentine. The card concept is a box of popcorn with the silly tagline: "I'm gonna POP you a CORNY question...will you be my Valentine?" I love silly, so I got to work.
First: I wasn't about to hand-cut an infinite number of popcorn bits. I have a cloud paper cutter, so I cut out the shapes and trimmed them a bit to look more popcorn-like.

They looked indistinct, white on white, so I decided to trace around the shapes with a black Sharpie. Much better! I had a pile of popcorn in no time.

I used my paper slicer to cut red stripes for my all-white rectangle of paper, used another paper cutter to make the background label, and stickers to make the word POPCORN.
Then I just glued the popcorn on, layer by layer...

I glued the completed box of popcorn onto a piece of pink construction paper and used glitter stickers for the impact words. My own personal touch was adding "will you be my valentine?" on ribbon banners that I rubber stamped, cut out, and glued to the bottom of the popcorn box.
Here she is!

I am very pleased with how it came out!
Alas, my desk area usually looks like this or much worse after a card-making session:


OMG! You are so clever. I love those cards. And what about She-ra? Now, I've been inspired and it wasn't even a Pinspiration it was a Blogspiration ;D
ReplyDeleteThanks.