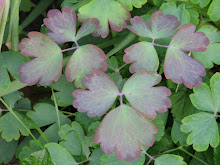
Another weekend, another walk through the botanical gardens. Todd and I love to take early-morning walks and spring is the perfect time. It can be bittersweet, because I saw a few favorites from my Indianapolis garden.
There, I'd planted viburnum on either side of the front door. It's an attractive shrub (if you prune it into submission) and the flowers in the spring have a delicious scent.
Oh, the daffodils!
I just finished a book on garden theory and design by David Culp (The Layered Garden) and he advised that you can stretch out the growth of a favorite flower by planting early-, mid-season, and late-blooming varieties. I did this with the lilac bushes I planted in our Indianapolis back yard.
Deer love hydrangeas, and I have yet to find a cage that lets our hydrangeas spread and grow but keeps the deer out. In Indianapolis, I had both Endless Summer and Little Lime growing all season along our side fence. At the botanical garden, I discovered something that I never knew existed...a hydrangea TREE!
My mind positively boggled at the bouquet, wreath, and landscaping possibilities. Needless to say, this tree is going to the top of my list for our FRP, or "final resting place" - the property where we settle for good and where I'm able to throw myself into making the cottage garden I've dreamed of since childhood.
But there are things here, of course, that I've never seen thrive in the midwest. Camellias, for example. The botanical garden has over 60 varieties. They've mainly bloomed and dropped by now, but the walk is still lovely.
Nice to meet an old friend on the trail, too!
I love seeing the semi-wildlife out and about, whether napping...
...or having a very serious meeting of the minds!
By the way, a group of turtles is called a bale. This discovery led me down a rabbit hole of delight (a group of caterpillars is an army! A group of ferrets is a busyness! A group of wild cats is a destruction!) but I was able to pull myself away to read more about the next creature we found...a banded water snake.
Non-venomous and totally benign, just having a rest in the sun.
The dogwoods are in full bloom, both at our house and at the botanical gardens.
Redbuds are still going strong.
I love walking on petal-strewn paths!
Borga doesn't care either way...she just wants to be out. Check out that smile!
I recently finished knitting a pair of socks, Jaywalkers. It was a bit of an experiment. When I first started knitting, I stocked up on any yarn that appealed to me without being particular about a specific project need or fiber content. Now that I'm more knowledgeable and discriminating about what I buy, I have a big box of these "guilt yarns" in my cabinet. I don't want to use them, but I hate to waste the yarn. I'll probably end up donating a lot of it, but I'm trying to find uses for some of it first. Self-striping yarn is just not my preference, but this pattern cleverly draws it into a kind of zig-zag design. Still, I'm just lukewarm about these. At least they're a good fit!
I've also started a quilt. No, I didn't finish the big star quilt from last week. I put it away until I feel more excited about it. I bought a coordinated layer cake set (42 10" x 10" fabric squares, all different) called Strawberry Fields Revisited. Beatles reference aside, I like the cheerfulness of the pieces and feel like it's a perfect spring quilt. I'm paper-piecing large stars that showcase 8 different designs. I'll have four (five?) squares like this:
...and four (five?) squares each of four other fabric combinations. I'm grumpy that even with paper piecing my points still aren't lining up perfectly or even very close in some cases, but I'm going to push forward. Practice makes perfect, and the quilting itself will hide a multitude of sins.
Have a great week!
Showing posts with label viburnum. Show all posts
Monday, March 27, 2017
Monday, April 18, 2011
Birthdays and Bouquets
Spring bouquets make me happy.
The lilac bushes are blooming, and I am so glad I got these $7 IKEA vases. Perfect for lilacs. A really nice contrast!
Our viburnum bushes provided this beautiful bouquet.
I just love these delicate pink flowers, and they're so fragrant.
I planted clusters of purple grape hyacinths all over the yard years ago, and I love picking these tiny spikes of bell-shaped flowers to make miniature bouquets.
We have loads of red tulips, and they're nodding on bookcases all over the house.
Even their backs are pretty!
It's hard to be in a bad mood when you've got a house full of fragrant flowers!
With all of this spring spirit, I decided to make some Easter-themed crafts. I've been wanting to utilize my egg cups! This particular project from Martha Stewart is fairly easy - dyed eggs, with plant leaf outlines, nestled in egg cups for display.
First, you have to hollow out your eggs. A little internet research showed many various techniques. There are special tools that will slice off the tip of your egg, and unique syringes that will draw out the insides. Everywhere warned of the dangers of salmonella but honestly, I've been eating raw cake and cookie dough since childhood and I'm still kicking! I decided to do this the old-fashioned way.
I simply cleaned the outside of the egg with vinegar to remove any impurities. Using a basic sewing needle, I pierced a single hole in the pointy end of the egg. Chicken eggs have the thinnest shells of all eggs, and it's quite easy to push the needle through.
At the wide end, make another small hole and enlarge it by picking away at the edges with your needle.
The hole should be wide enough so that some egg white starts to bulge out.
You need a little more force, though. Just put your lips to the pin-hole at the top of the egg and blow. The egg insides will shoot out of the small hole in a steady stream and soon your egg will be hollow.
By the way, don't waste your eggs! Add some cheese, spinach, mushrooms, and onion, and make a frittata. ;)
I sprayed vinegar into the larger hole, swished it around, and blew it out. When no more egg white appears, you're done. Just let the egg dry for a day or two.
There are lots of things you can do with hollow eggs. For this project, I assembled some hollowed-out eggs, cheesecloth, snips of plant leaves, twine, and food coloring.
I used egg white to 'paint' the backs of my leaves and smooth them onto the egg shells. I wrapped each egg tightly in cheesecloth (pantyhose would work as well) to help hold the leaf in place.
I mixed up some dye using vinegar, hot water, and food coloring. Each egg was held in the dye for about 5 minutes.
Then, I peeled off the cheesecloth to reveal the design.
I made 4 eggs this way and was really pleased with the results!
However, they didn't really 'go' with our decor too well.
I ended up preferring an undyed egg from the reject pile. I think it's a little more my style!
Still, it was a fun project and I might do some experimenting to see if I can come up with some more natural colors.
Todd's birthday was this week. Per his request, I whipped up a 3 layer German chocolate cake. It was a little labor-intensive...especially caramelizing the icing...but it was worth it. It was absolutely the best German chocolate cake I'd ever had.
I made a ring of violets on the top to brighten it up a little bit.
I also made an apple pie that was quite delicious. Of course, I skipped the traditional lattice crust in favor of a Star Wars theme.
Yoda has never looked so delicious.
We topped off the day with a surprise party. The birthday boy was completely caught off guard.
Well, you only turn 40 once! :)
In other news, I've finally finished my cardigan. Last week I blocked it carefully...
...and ordered some cool buttons. I originally searched for simple light wood buttons, but was having a lot of trouble finding what I wanted. I decided to go with some vintage metal buttons instead and I'm glad I did. I really like them!
I'd spaced my buttonholes fairly close together and these small buttons were the perfect finishing touch.
I'd made many modifications to this sweater...changed the gauge, lengthened the body, lengthened the sleeves, and raised the neckline. The original neckline was meant to be low enough to sexily slip off one shoulder, but that's not exactly my style.
I'm really pleased with the final result. It was a fairly quick and easy knit.
I'm so glad I got to use my special "snowflake yarn" to make this cardigan. It will be perfect this fall, for chilly morning walks.
Have a great week!
The lilac bushes are blooming, and I am so glad I got these $7 IKEA vases. Perfect for lilacs. A really nice contrast!Our viburnum bushes provided this beautiful bouquet.
I just love these delicate pink flowers, and they're so fragrant.
I planted clusters of purple grape hyacinths all over the yard years ago, and I love picking these tiny spikes of bell-shaped flowers to make miniature bouquets.
We have loads of red tulips, and they're nodding on bookcases all over the house.
Even their backs are pretty!
It's hard to be in a bad mood when you've got a house full of fragrant flowers!With all of this spring spirit, I decided to make some Easter-themed crafts. I've been wanting to utilize my egg cups! This particular project from Martha Stewart is fairly easy - dyed eggs, with plant leaf outlines, nestled in egg cups for display.
First, you have to hollow out your eggs. A little internet research showed many various techniques. There are special tools that will slice off the tip of your egg, and unique syringes that will draw out the insides. Everywhere warned of the dangers of salmonella but honestly, I've been eating raw cake and cookie dough since childhood and I'm still kicking! I decided to do this the old-fashioned way.
I simply cleaned the outside of the egg with vinegar to remove any impurities. Using a basic sewing needle, I pierced a single hole in the pointy end of the egg. Chicken eggs have the thinnest shells of all eggs, and it's quite easy to push the needle through.
At the wide end, make another small hole and enlarge it by picking away at the edges with your needle.
The hole should be wide enough so that some egg white starts to bulge out.
You need a little more force, though. Just put your lips to the pin-hole at the top of the egg and blow. The egg insides will shoot out of the small hole in a steady stream and soon your egg will be hollow.
By the way, don't waste your eggs! Add some cheese, spinach, mushrooms, and onion, and make a frittata. ;)
I sprayed vinegar into the larger hole, swished it around, and blew it out. When no more egg white appears, you're done. Just let the egg dry for a day or two.There are lots of things you can do with hollow eggs. For this project, I assembled some hollowed-out eggs, cheesecloth, snips of plant leaves, twine, and food coloring.
I used egg white to 'paint' the backs of my leaves and smooth them onto the egg shells. I wrapped each egg tightly in cheesecloth (pantyhose would work as well) to help hold the leaf in place.
I mixed up some dye using vinegar, hot water, and food coloring. Each egg was held in the dye for about 5 minutes.
Then, I peeled off the cheesecloth to reveal the design.
I made 4 eggs this way and was really pleased with the results!
However, they didn't really 'go' with our decor too well.
I ended up preferring an undyed egg from the reject pile. I think it's a little more my style!
Still, it was a fun project and I might do some experimenting to see if I can come up with some more natural colors.Todd's birthday was this week. Per his request, I whipped up a 3 layer German chocolate cake. It was a little labor-intensive...especially caramelizing the icing...but it was worth it. It was absolutely the best German chocolate cake I'd ever had.
I made a ring of violets on the top to brighten it up a little bit.
I also made an apple pie that was quite delicious. Of course, I skipped the traditional lattice crust in favor of a Star Wars theme.
Yoda has never looked so delicious.
We topped off the day with a surprise party. The birthday boy was completely caught off guard.
Well, you only turn 40 once! :)In other news, I've finally finished my cardigan. Last week I blocked it carefully...
...and ordered some cool buttons. I originally searched for simple light wood buttons, but was having a lot of trouble finding what I wanted. I decided to go with some vintage metal buttons instead and I'm glad I did. I really like them!
I'd spaced my buttonholes fairly close together and these small buttons were the perfect finishing touch.
I'd made many modifications to this sweater...changed the gauge, lengthened the body, lengthened the sleeves, and raised the neckline. The original neckline was meant to be low enough to sexily slip off one shoulder, but that's not exactly my style.
I'm really pleased with the final result. It was a fairly quick and easy knit.
I'm so glad I got to use my special "snowflake yarn" to make this cardigan. It will be perfect this fall, for chilly morning walks.
Have a great week!
Labels:
apple pie,
baking,
birthday,
blow out,
cardigan,
dyed eggs,
Easter,
eggs,
fingering weight yarn,
german chocolate cake,
grape hyacynth,
hollow eggs,
knitting,
lilacs,
star wars,
tulips,
viburnum
Subscribe to:
Posts (Atom)