Tuesday, February 18, 2014

"Prints" Charming

More snow in South Carolina!


I love it.


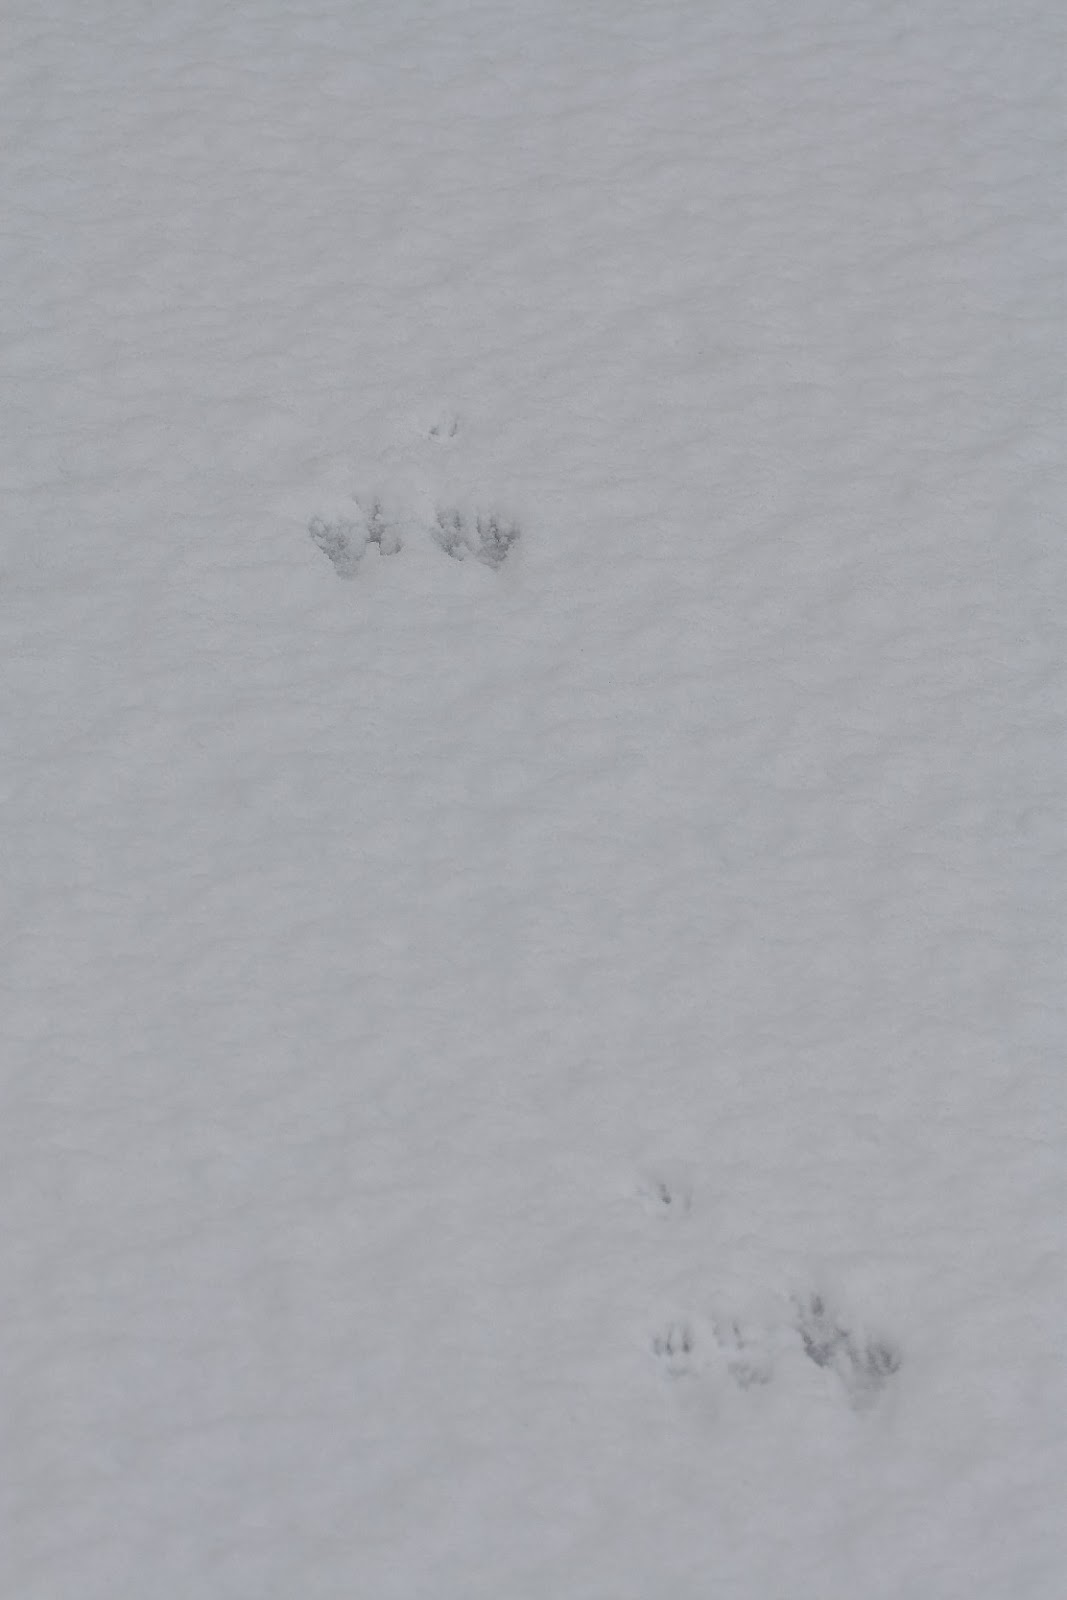
One interesting aspect of snowfall is how it displays the secret lives of the animals around us, told to us through the footprints left behind.  The smaller print here shows a squirrel.
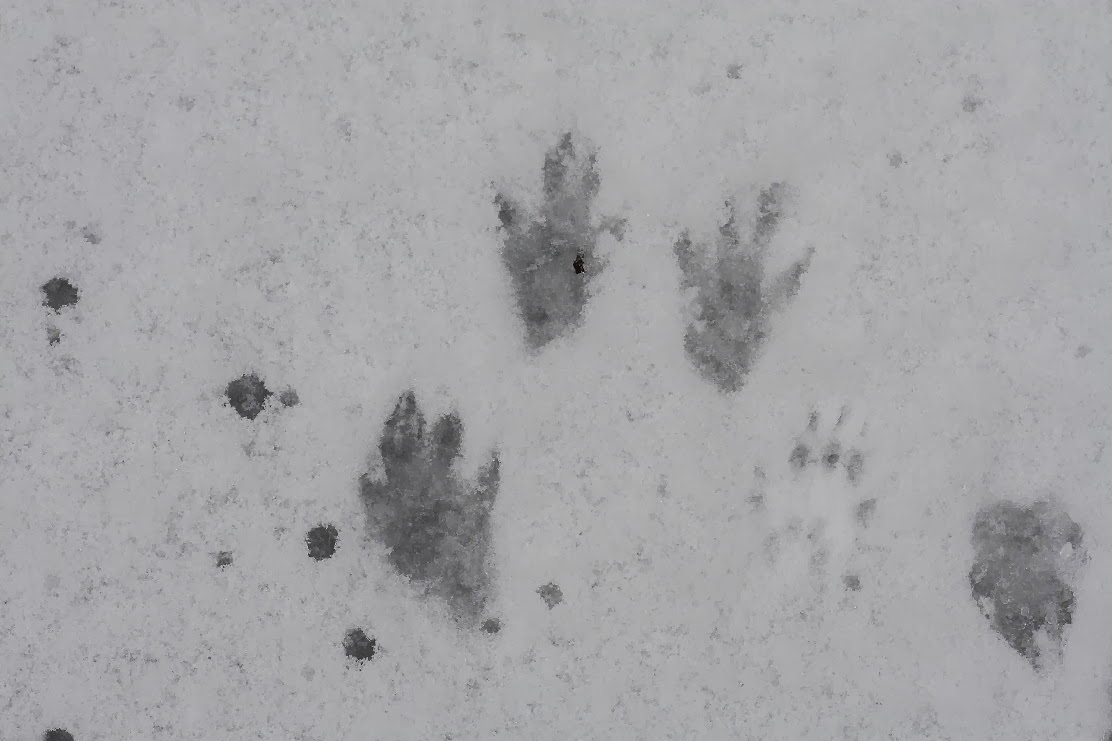

I followed his prints to his secret stash, where he dug up and consumed a buried nut.


Here's a fox.


Deer...


Raccoon.


They all have very distinct "lopes".  Here is a squirrel (similar to a raccoon print but without the extra toe) that's been bounding across the surface.  Back paws and front paws touch in the same area, like a bounding house cat, and not in a long lope...


...like this deer.


This pair of foxes loped easily alongside each other for a while, but then got in a great fight...with a small animal?  with each other?...before taking off in separate directions.


One clue for fox identification:  you can see tail drag marks by the footprints.


I'm no expert or even close, but it was nice to have a confirmed sighting...even if I was completely sure about the hoof prints!  :)


Many of the camellias are still doing well...


...and the snowdrops are coming up!  I can't wait!


More snow necessitates warm gloves, but I was upset to see yet another pair of hand knitted gloves with a big moth-eaten spot.  I kept my yarn in an open cabinet at our Indianapolis house and both the yarn and my wool sweaters are untouched, but strangely, most of Todd's wool sweaters and my winter woolens, stored in a big cedar chest, are affected.


I thought perhaps I could patch them by cutting away the frayed strands, picking up the live stitches, and knitting a neat white square.


I knitted a bit of fabric to stretch over the opening...


...but ended up with...a giant barnacle.


Sigh.  I will have to re-knit this glove.  I consoled myself by dipping into my precious cinnamon chip stash and making cinnamon chip scones.  The original recipe is at this site, and my only modification would be to add MORE cinnamon chips.  Now, I've heard about cinnamon chips for a long time, but they aren't sold in South Carolina (that I've found).  I had some in Portland over the Christmas holiday and they've rapidly replaced chocolate chips as my favorite mix-in.  I placed a wish for cinnamon chips on my Ravelry "wish list", and two kind strangers sent bags.  I now have three bags of cinnamon chips, and I am carefully rationing them out. 

This was a good splurge.


Cinnamon chips are a mystery.  Why are they so much better than plain cinnamon?  Why don't they taste very good plain?  Why are they so fattening?  I don't know the answers to these questions, but I do know that when added to scone or cookie batter, they turn into something otherworldly.  If you are one of the lucky people with easy access to cinnamon chips...make these! 


Have a great week!

Thursday, February 13, 2014

Timely Valentine

I always feel a little guilty about posting Valentine ideas here the week after Valentine's Day.  After all, I don't want to spoil anything for Todd, or for my Valentine recipients.  This year, though, I managed to get my Valentines out early, and I think they've mostly been received.  Therefore, I can safely post an idea here, just in time for Valentine's Day.  An idea that you can whip up last minute, because it only takes 4 ingredients and some scraps of paper.  Yes, I'm talking about fortune cookies.  I've made and blogged about them before, but it's worth repeating:  these are quick and easy cookies that can be customized to any holiday or event.  I absolutely love making them!

Please refer to this website for directions and recipe, but I can show you my steps!

First, I made some punny tags.


I cribbed funny fortunes from several internet sites.


I already had tiny festive takeout boxes, purchased at Michael's after-Easter sale last year.  They were small, though, so I had to make extra-tiny cookies.

Just a half teaspoon or so of batter, baked exactly 5 minutes.


I folded them quickly and put a tablespoon on top of each to hold the shape.  They harden in about 30 seconds!


I made stacks and stacks of them...almost 200 total!  Sigh...aren't they beautiful?


I put a sheet of Saran Wrap in each takeout box:


I filled them all assembly line-style.


I folded the wrap over the top and sealed them with a stamped Valentine's Day sticker.


Love love love!


I hope you give it a try!

I've also made some cards recently and thought I'd tag them onto the end of this post.  This card idea was cribbed from Pinterest and shows a cookie sheet - surprisingly easy to make with leftover sparkly Christmas cardstock. I hand-cut the cookies and manually rounded the corners of a papercut rectangle to make the cookie sheet. 


Inside:


Someone I know had surgery recently, so I got to use this "Feel better!" card I've been wanting to make for a while.  I'm just getting into pop-up cards, and so this was great fun to make.  Specific dimensions are available at this web site!

Fold a small piece of paper...


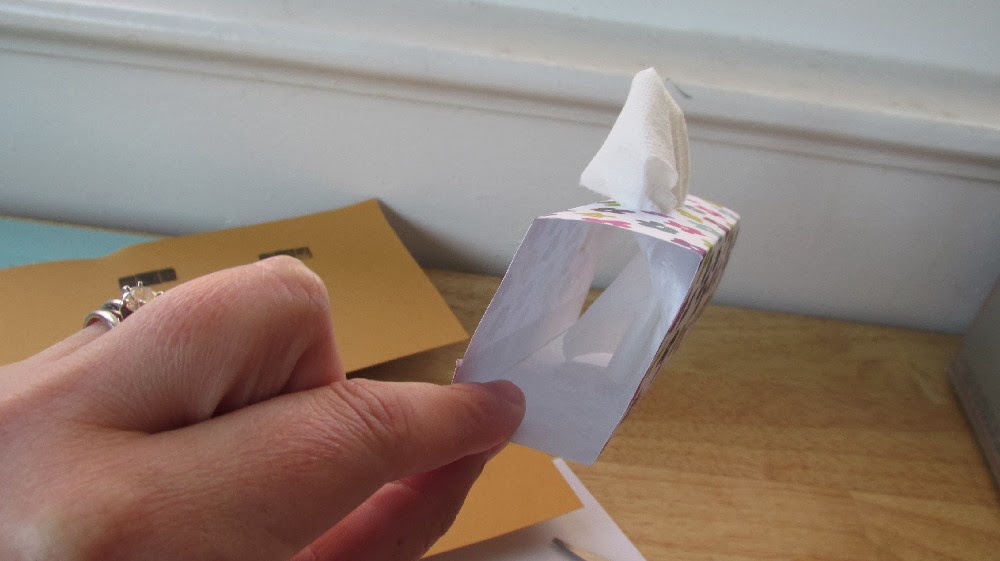
Tape the ends together and seal, and cut a small hole in the top.  Fill with a bit of Kleenex.


Use glue to affix in the fold of your card...


...and add your details!


I really like it, and it was pretty easy to make.  

I hope you have some craft time soon.  Have a great week! 

Tuesday, February 11, 2014

"It's time to make the doughnuts!" - Michael Scott

I've never really thought about frying doughnuts at home.  I don't have a deep fryer, don't particularly care for doughnuts, and I had a horrifying accident as a child when flaming cooking oil was splashed down my left leg.  The doctor said I'd have the huge, puckered scars for life, but my grandpa embarked on a home remedy treatment that eradicated them after two years.  Suffice it to say, though, I now avoid heated oil like the plague.

Still, I wasn't able to get doughnuts out of my mind last week, in part because I'd been looking for a special treat to end Todd's extra-hectic work week.  Thursday's treat, a molten lava cake with a chocolate/strawberry center, was a bust, since I removed it from the oven and promptly dropped it on the floor.  Todd gamely ate the scraps, but I couldn't help but feel like it was a bit of a letdown.  And Todd, who doesn't have much of a sweet tooth, loves maple doughnuts.  I tried to resist the idea, but when I found myself musing, "I wonder if they carry maple extract?" when passing by a grocery store on Friday morning, I knew it was all over.  

I will warn you now that I have no "glamour shots" of this process.  I tried one dough recipe that was a total flop, so it was almost 4:00 (and with rapidly fading light) before I found a great recipe and was able to get the process going!  The photos are poor, but I hope they're still helpful.

I was really surprised to learn that making doughnuts at home is not much more difficult or time-consuming than making a loaf of bread.  You mix up the dough ingredients, let it rise, roll it out and manipulate it into the desired shape(s), and let it rise again.  Instead of popping your loaf into the oven, you drop your shapes into hot oil for a little over a minute total...and you're basically done!  While messy, it was surprisingly easy...and I was absolutely caught off guard by how amazing a freshly-fried doughnut tasted.  I'm not a maple fan, but the maple flavoring was so subtle.  Todd declared these "THE BEST DOUGHNUTS I'VE EVER HAD IN MY ENTIRE LIFE!!" and at the risk of tooting my own horn, I'd have to agree.  I had a regular Tom Hanks moment (a la Castaway), strutting around the kitchen and crowing about my accomplishment. Really, though, it's not due to my skill, but to good basic ingredients and following proper form.  

Let's dive in...


Doughnuts
Maple Variety


Dough recipe from How Sweet It Is

Maple Cream recipe from She Knows, slightly modified


Dough                                                                         

1 ½ cups milk                                                                

1/3 cup water                                                                 

1/3 cup butter, unsalted                                                 

1 tablespoon honey                                                        

4 ½ teaspoons yeast                                                     

2 eggs, lightly beaten

¼ cup sugar

1 teaspoon salt

1 teaspoon nutmeg

5 – 5 ½ cups flour

oil for frying at 2 – 4” depth

Filling
1 stick butter, unsalted
4 tablespoons maple syrup
3/4 teaspoon maple extract (to taste)
2 cups powdered sugar
4 tablespoons milk


Frosting

4 tablespoons butter, unsalted

1 teaspoon honey

¼ teaspoon salt

¼ teaspoon vanilla

1+ teaspoons maple extract (to taste)

12 ounces powdered sugar

4 tablespoons milk (to reach desired consistency)


Directions

Heat milk, water, and butter together in a saucepan until butter is melted.  Let cool from “hot” to “warm” and then add yeast and honey.  Combine, and then add eggs, sugar, salt, nutmeg, and half of the flour.  Mix, then with dough hook attachment in place, add the rest of the flour and knead for about 7 minutes.  Dough will be sticky but if it doesn’t form a loose ball, add more flour until it does.  Cover and let rise until doubled, about 45 – 60 minutes. 


When it’s fully risen, slide the dough out onto a well-floured surface and roll to a one-inch thickness.  Cut it into desired shapes and cover again, placing in a warm place and letting it rise for another 30 minutes or so.  I used my crumpet cutters to make these shapes and since I was going with a filling, opted not to cut out a center hole.  You could also cut long rectangles...anything you want!


 Meanwhile, heat your oil.  I used canola oil, which made a terrible ‘fishy’ smell but didn’t affect the taste of the bread.  I’ve heard that peanut and vegetable oils are less offensive.  Dip your thermometer into your 2 – 3 inches of oil and heat it to about 350 degrees.  Watch it…don’t let it get over 370!  When it’s ready, place your doughnuts in, 2 or 3 at a time.  The oil will sizzle when you drop the dough in...don't worry!  It startled me, but when no flames erupted, I felt able to continue with the process, albeit shakily.  :)  Let the dough cook for about 45 seconds.  Use a slotted spoon and turn, letting it cook for 20 seconds on the other side.   Remove and let oil drain off.  

 
A nice golden brown!


While doughnuts are cooling, whip up your filling by creaming the butter, syrup, and extract, and then adding the powdered sugar.  Add as much milk as you need to achieve a pipe-able thickness.


 For the frosting, combine butter, honey, salt, vanilla, and maple extract.  Add powdered sugar and mix, and then add milk to reach your desired thickness.  For both the filling and the frosting, add the maple extract in small increments until you have the desired flavor.  


Wait at least 30 minutes for the doughnuts to cool before filling.  Using a wide-ended tip and a filled pastry bag, poke into the bottom of your round doughnut (or in a long line in a rectangular one) and squeeze in a healthy amount of filling.   

Wide tip...


Resulting holes:


You could probably cut a corner in a plastic sandwich bag if you don't have a metal tip.   I didn't have time to let my doughnuts cool before filling and frosting, since I was an hour behind schedule.  You can still fill and frost hot doughnuts, but you'll need to keep them turned upside-down to keep the hot filling from running out!  I highly recommend waiting, though.

Use a small spatula to slather frosting on top.  Because I frosted these doughnuts hot, and the fading light, they don't look very nice, but let me repeat:  a freshly-fried doughnut will rock your world. 


 Doughnuts are best enjoyed the first day, but reheat nicely.


The basic dough recipe is amazing, and there are really almost endless possibilities for frostings and fillings.  I try not to make fried food (I actually can't remember the last time I fried something), but this is a great treat and freezes well.  I halved the recipe above and it made 7 round doughnuts.  I had one, Todd had one, and the rest got popped into the freezer, individually wrapped, for another day.  

I hope you give it a try.  I always feel such a sense of accomplishment when I attempt something that intimidates me and I succeed.  I know that if he could, Tom Hanks would say, "I HAVE...MADE DOUGHNUTS!"  And Michael Scott would say, "Your doughnuts make me go nuts!"  They're THAT good. 

Have a great week!


Wednesday, February 5, 2014

Snow Day

Most of the country has been clutched in Winter's icy grip for months now.  They've had ice, sleet, snow...repeat.  South Carolina is not known for its snowy winters, however.  We usually experience something in the relatively balmy 40 - 55 degree range, with lots of sun.  Last week, though, something happened.  The temperatures dropped, the wind shifted, and...we got snow.


Not a heavy wet snow, but a light, powdery mix.


Still, it was enough for me to dig out my snow boots and head outside.


It was so strange to see our "tropical" plants covered in snow.  Our palmetto...


...and our japonica both looked so strange with their white dusting.


I love taking photos of the snowflakes.  Each one is individual, or so they say, since my macro lens doesn't magnify the flakes enough to make this determination for myself.


I brought Bosewichte, my intrepid explorer, with me.  He loves being outside in the snow.


I can't say the same for these Canadian geese, who quickly landed in our pond when the snow started and huddled together by the banks until the worst of it was over.


We can go about a quarter mile into the woods by our house before being cut off by a ravine, but it's a nice short walk in this sort of weather.


The snow melted after one day, but we'll always have the memory of South Carolina's version of a real winter storm!


Moving on to a different sort of "ice"...I've been reading about Jeni's Splendid Ice Cream for a while now.  As an ice cream aficionado, I've wanted to sample it to see if it was really worth $10 per pint.  It's gotten rave reviews, but the price seems awfully steep.  Todd and I had to make a run into Greenville recently, and lo and behold, a Whole Foods there carried the elusive pints.


I settled on Brambleberry Crisp, which was a honey vanilla bean base swirled with real fruit jam and oatmeal crisp pieces.  So what did I think? 


It was really rich, with complex flavors.  Lots of oatmeal crisp pieces, but I felt like most of the jam was on the bottom of my pint, which meant that only the last bowl was really perfect.  Fortunately, it only took a day or so to get to that "last bowl".  Good ice cream, but I'm afraid my tastes are a little more juvenile.  As you can see in the photo above, I prefer to keep a little cookie dough ice cream on hand, or maybe some cookies and cream.  I'm just not sophisticated enough for most of Jeni's flavors, and I'm certainly too cheap to spend $10 for a pint of ice cream.  It was nice for a treat, though!

By the way, I bought these little flower-shaped bowls specifically for ice cream.  They're small, so that a single serving of ice cream (about a half cup) fills them completely.  That way, I *feel* like I'm getting more ice cream than I actually am.


Finally, on to a knitting project that I completed in a timely manner, just as the snow was starting to come down...a pair of socks!  I mainly knit for others, but this year I've decided to knit a few things for myself.  I started with this Cherry Tree Hill wool in the Apricot colorway.


I have a tendency to buy yarn and store it away because "it's almost too nice to use."  No more!  I've had this yarn for at least 5 years, and I'm happy to say that I used the entire skein.  I chose a vintage pattern from 1898, which was originally a french sock pattern for a child, but has been re-sized and updated for an adult woman.  Now, some people in the knitting community might say that knitting fancy socks is like the nuns in Castle Anthrax making 'exciting underwear' that will never be seen (for those of you who are Monty Python fans), but I enjoy making socks.  It's a nice small space to try out new stitches.

These socks have little wheat sheaf-like patterns all around, with three lines of "scales" at regular intervals.


They were a perfect fit!


Now, I'm usually a fan of using solid-color yarn for socks, because I think variegated yarn detracts from the pattern, especially if it's complicated.  But I don't mind it so much here.


These warm socks, with a little bowl of ice cream, are perfect for these cold weather days.

Have a great week!