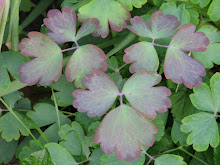
Lesson #2: some plants just aren't 'meant to be.' I've tried to grow creeping jenny for three years, and I kill it every year. This year it took a record two days to shrivel up. Oh, well!
 Lesson #3: always keep an eye out for rogue mantises. They're coming out of the woodwork...literally!
 All mishaps aside, the garden is blooming nicely now. I'm just waiting on my marigolds and my rose of sharon bush.
 The bees are out and about. Little honey bees...
 ...and larger carpenter bees are frantically gathering up pollen!
 Other little creatures, like this grasshopper, are glimpsed from time to time.
 In this hot weather, we like to get out in the early mornings for a relaxing walk in the park.
 I love the butterfly garden there. Especially I love this spiky purple plant called a blazing star. They bloom all summer long and are really beautiful en masse.
 Bees and butterflies love to delve into this little filaments!
 Speedwell is also good for bees and butterflies, and so beautiful...
 ...and, of course, coneflowers.
 They look so nice against the purple blazing stars.
 Less showy but just as nice, an oak leaf hydrangea flowers in the shade nearby. The bushes can get quite large, but they're beautiful plants that are a nice change from hostas if you've got a large shady area to fill.
 Acorns are ripening on oak trees...
 ...and the bees are taking advantage of the flowers! This hive died out over the winter, but was replaced this spring with a new, healthy colony. It looks like they're thriving!
 This impressively-named Tawny Emperor butterfly (asterocampa clyton) lit briefly on this tree as we walked by. They don't hold still for long, though!
 Despite the heat, I've been doing a fair amount of baking. One thing that used to intimidate me was pies, but really, they aren't hard at all! A homemade crust doesn't take much time and tastes so much better than store-bought. Here's my recipe and a quick tutorial!
All-Butter Pie Crust
Smitten Kitchen
One double- or two single-crust pies
2 1/2 cups all-purpose flour
1 tablespoon sugar
1 teaspoon salt
2 sticks butter, cold
Before starting, place several ice cubes into a cup of water. Go ahead and mix together your flour, sugar, and salt. Make sure your butter is VERY cold and dice it into small pieces. Use a fork or pastry cutter and cut your butter into the flour until the butter is pea-sized. Be sure not to overwork!
 Now, take your ice water and slowly drizzle it over your flour mixture. You'll probably use about 3/4 cup total. Add 1/2 right away and gently mix. Add the additional 1/4 cup a tablespoon at a time.
  Once you can mound your dough together, wrap it in plastic wrap and refrigerate it for an hour or so. See? That's not so bad! It takes less than 10 minutes to mix this up!
After the dough has rested, take it out and cut it in half. The key is to work with cold dough, so put one dough ball back in the refrigerator and just work with one at a time. Be very generous with your flour and roll out the dough until you've got a 12-inch circle. I use a 10-inch bowl and tack on an extra two inches, just cutting around with a knife. I was an inch short in this example but it worked just fine for me. Don't throw away those dough scraps! I've got a great recipe for using them up next week.
 Place your dough in the pie pan...
 ...and crimp the edges with your fingers.
 Stab the bottom with a fork a few times and bake at 325 for 15 - 20 minutes, until firm. Look at the flaky layers!
 I chose to fill this particular pie with strawberries...
 ...and make a simple strawberry pie. No additional baking needed and it's delish!
I hope you take some time out to bake this week. Enjoy!


 Posts
Posts