The days are warm, the windows are open, the flowers are blooming, the birds are singing...
...and my selected photos file overfloweth! My recently completed craft projects have gotten buried, so I've decided to do a quick recap.
First, I finished knitting a pair of quilt-inspired socks.
The first sock was knitted toe-up. I love the toes of toe-up socks - none of those irritating side flaps, a quick foot, and then you can try them on to decide how long you'd like the leg portion to be. But oh, those heels. I despise the heels on toe-up socks and this was no different. I knitted the whole sock and discovered, as usual, that I had trouble pulling it up over my heel. Only major blocking enabled it to be worn properly. It was such a painful process that I knitted the second sock cuff-down and just made a simple checkerboard pattern on the sole. They're both different...
...but I don't care. Normally I refuse to knit patterns with long "floats," or strands of yarn that you have to carry over 7 or more stitches. If you "catch" the float as you knit, it usually shows through. If you let it go and hope for the best, it can affect the tension and toes/fingers get easily caught in the long strands. This pattern had a 9-stitch float, but I loved it so much I pressed on. I'm very pleased!
I've been wanting to do more with felt, so I ordered a felt ornament kit and have made 2 of the 3 ornaments. The first is a vintage wool coat with real tiny buttons and a gingham ribbon. I used interfacing web to trace the pattern and attach it to the wool felt.
Cut out the pieces...
...and start sewing them together.
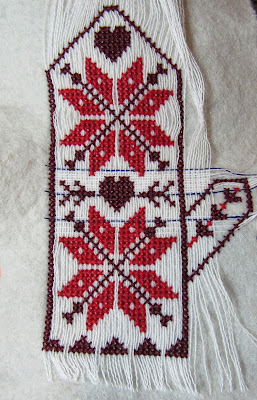
This is one of my favorite crafts, ever. The details are so charming, and those teeny tiny (1"!) Scandinavian mittens...
I have it hanging by my computer because I just can't believe that I made it! 100% love!
The other ornament was entirely different. You affix a piece of cross-stitch fabric to your wool felt and cross-stitch the design...
Here was another new piece of crafting technology. I like to cross stitch but am not very fond of the stiff fabric that you seem to be limited to. But with this, you simply soak the whole design in cool water for a minute, which softens the fibers. Then you pull out the individual strands with tweezers. It sounds time consuming, but it only took a minute.
Then cut out shape and sew sides together.
These weren't quick projects. The coat took several days of "a few minutes here, a few minutes there" and a few longer sessions. The mittens took several hours to cross stitch over multiple evenings. But...I think they're amazing and I'm absolutely delighted!
A quicker project: a simple envelope pillow cover for the bright orange pillow that appeared on our couch one day (Todd: "I just found it in the basement!").
I had some heavier-duty fabric and it miraculously matched the other pillow, although that isn't really important to me. More important - and a bit more difficult - was making sure the lines on the fabric were continuous.
Envelope pillows are easy....hem both ends, overlap them, and sew. This was a 30 minute project.
And...I've started a new quilt! Actually - and I can barely believe this myself - I am nearly done with it. I had noticed a quilt online that I really liked - grey gingham with a mustard border. I immediately ordered the fabric...1.5 yards of white and charcoal, 2 yards of grey.
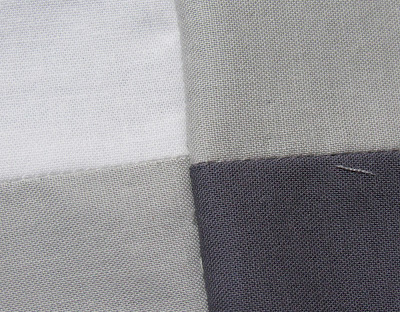
I cut the fabric (3.5" squares) in one night and started sewing together my "four patches." It was incredibly quick, because the fabric was pre-cut and you only sew 3 lines per patch. I had them done in no time. Here they are, all laid out, with the mustard fabric for contrast.
After this, I "squared up" my blocks so that they were all exactly six inches.
I learned a really valuable lesson. About 25% of the time, my squares would be off-kilter a bit.
I pinned and pinned and pinned, but no luck. It wasn't until I started pinning perpendicular to the top and even with the center seam that I started having amazing accuracy.
The rows of the quilt are already sewn together! Now I have to sew together the strips of rows, and the top of the quilt will be DONE. Normally this color combination would be too subdued, but I love the pop of color that the mustard color will bring (Kona Cotton Curry). It's one of my favorite colors. I have a ton of yarn in various shades of mustard!
Another lesson learned: when I ordered the fabric for this quilt, I ordered a yard of the main fabric I'd wanted to use for my next quilt. I was surprised when it arrived...the swans, which I'd thought were small (around an inch), are HUGE. Here's a pen for scale:
This won't work at all. I would be dealing with tiny bits of fabric, many of which wouldn't have any peach from the swans on it at all. The image of the swan itself would be bisected multiple times. Oh, well, live and learn. At least I didn't order all the fabric to make the quilt. It's back to the drawing board for this one!
I did another craft project for Valentine's Day, but it was a bust. I'm saving the idea, though, for next year.
I've been slowly knitting a scarf/shawl over the past few months, very sporadically, and have just run out of yarn. I'm lukewarm about the pattern so not sure if I'm going to order more.
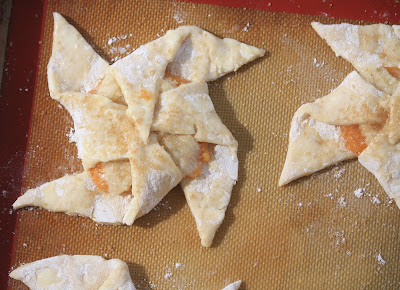
February Fancy Baking was last week! I made Danish pinwheels with homemade apricot spread and almond cream. I chose apricot because it's not a fruit that I like, but I discovered that adding lots of sugar and butter to even an unpleasant fruit makes it a lot more palatable. ;) The dough was similar to a yeasted pie dough, only with larger cuts of butter. The pinwheels were surprisingly easy to make - just fold up every other flap.
I had some extra dough/fillings so made little fruit roll-ups. You can see how flaky the pastry is here!
This is a Julia Child recipe, and she recommends eating immediately - "or at least within a few hours." I had to add a This is day-old pastry, beware! disclaimer to the container that Todd took in to his office!
And finally, to corgi lovers and non-corgi lovers alike...HAPPY VALENTINE'S DAY!
Subscribe to:
Post Comments (Atom)


No comments:
Post a Comment