
Today, though, my head is stopped up and balloon-like, I'm dizzy, with a runny nose, and my scratchy throat is back. However, it's a great day to be sick. The weather has turned cool, and I've put on my flannel pajamas. I have a good book, and a good knitting project. Best of all, I've had a very productive week, and finished my work yesterday, so I don't have to feel guilty about a sick day on the couch.
This has been a busy week indeed! Under the watchful eyes of the cats...
 ...I've been outside, dodging mosquitoes and harvesting what I could from the garden. Finally, we're getting a nice amount of tomatoes.
  I have to be careful, though. Other creatures find the tomatoes and their sheltering leaves useful, like this mantis.
 A yellow-striped army worm (Spodoptera ornithogalli) is in seventh heaven here. They like the tomatoes themselves, and the leaves too. A group of army worms can absolutely decimate crops in an area before taking off, en masse, to the next banquet.
  I didn't see any other army worms that day, thankfully. They're destructive, but I couldn't help but admire his symmetrical markings and soft coloring.
  Of course, I had to pick more bouquets. The cosmos are going to seed fast so I've got to get the flowers while I've got a chance!
 I harvested other things, too. A friend with a peach tree invited me to take some home...
 ...and also, some of her beautiful Concord grapes. She had so many growing on her single vine that she kept heaping more and more bunches into my little bag.
  I ended up with five pounds of grapes!
 Five pounds is exactly the amount needed to make a batch of grape jam. Now, I've never made jam before, or canned. I have less-than-promising memories of blown jars and rusty lids in my grandma's larder. Also, I don't have any fancy equipment...the round jar-lifting tongs, the tall pots. But I tell you that with no special equipment and almost no money, I made some pretty fantastic grape jam!
 Here's what you will need:
5 pounds of grapes
7 cups of sugar
a box of pectin
1/2 teaspoon butter
mason jars and lids
one or two large pots
tongs (I used Target's OXO brand)
Cheesecloth
That's not too bad, right?
First, fill your two large pots with water and bring to a boil. In batches, you'll need to sterilize your mason jars and lids by boiling them for at least 5 minutes each. I was able to fit 3 jars per pot so this didn't take much time at all! Then I set them out on a clean cloth and carefully put the lids back on top.
 Next, you need to separate the grapes from the stems and wash them. Small spiders sometimes make little web nests in between the grapes, so pluck carefully!
 Then, you need to mash your grapes. You can use your hands, but I used a potato masher.
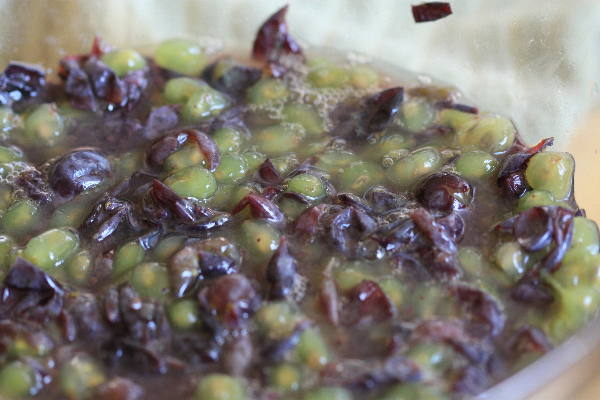 Put your crushed grapes back into a pot and add a cup of water. Bring to a boil and simmer, covered, for 10 minutes.
 Let it cool and then use a cheesecloth to strain the juice. What's left behind is a pretty disgusting pile of pulp...throw that away.
 Here's the quick and easy finale! Measure out 5 cups of grape juice, add your box of pectin, and bring to a boil. Stir in that bit of butter...it keeps your jam from foaming too much. Add your sugar and boil for one minute. And...that's it! Ladle the liquid into the waiting jars and seal.
 One other thing. An optional step here is to give your jam a 'water bath.' It is not "preserved" in its current state...you must go one step further to ensure that no bacteria infects your jam. A water bath is easy. Bring a pot of water to a boil and gently lay your filled jars inside, and then lay them on their sides with the tongs. They should be completely submerged. Let them boil there for 5 minutes, and use tongs to remove. The jam can take up to 24 hours to completely cool and set. As it cools, you'll hear your lids pop. If you can toggle the lid centers up and down, your jam didn't seal. Either try another water bath or just stick it in your fridge and plan on eating it in the next few weeks. Your preserved jam, though, will last for months!
I got five 10 ounce jars of jam, plus one 12 ounce jar of leftover grape juice, from my 5 pounds of grapes. The whole process, from start to finish, took about 2 1/2 hours.
 It was a really fun way to spend an afternoon! Of course, I had to get my rubber stamps out and make labels.
 The jam isn't purple like grocery store grape jam...it's almost raspberry-colored. And delicious.
 Spread on toast, it's our new favorite nighttime snack.
  I really hope you give it a try this fall! I've included the recipe in easy-to-read format below. Have a great week!
Grape Jam
From multiple sources
Nearly fills 5 12 ounce jars
Ingredients and Tools
5 pounds of grapes
7 cups of sugar
½ teaspoon butter
1 box pectin
Tongs
2 big pots
At least 6 12 ounce jars
Sterilize your jars
Wash, and boil for 5 minutes each
Make the grape juice
Weigh out 5 pounds of grapes
Crush with a potato masher
Add to pot with 1 – ½ cups water and bring to a boil
Simmer, covered, for 10 minutes.
Cool and strain the grape mixture. You’ll have about 7 cups.
Make the jam
Start a second pot boiling for your water bath.
Measure 5 cups of grape juice into pot.
Add 1 box pectin and ½ teaspoon butter.
Bring to a boil, stirring frequently.
Once it’s you’ve got a rolling boil, toss in 7 cups of sugar. Bring back to rolling boil and stir for one minute. Remove from heat. Skim off foam if applicable.
Canning and Storing
Pour liquid into prepared canning jars, leaving an inch open at the top. Wipe off threads and put on lids, but don’t screw them on too tightly. Once the water in your water bath is almost boiling, add jars and let boil for 5 minutes. Remove and let cool. As they cool, you’ll hear the tops pop. After they’ve cooled 24 hours, tap the button on top. If it toggles up and down, it’s not sealed. If it stays down, you’re safe. Jam should be good for six months.


